Storage
Storage is where you configure the backend systems that ThetaSecure uses to persist files and where you browse, upload, download, and share those files. ThetaSecure stores agent release binaries, session recordings, configuration backups, and other operational data in these backends. You can use the local server filesystem, cloud object storage, or remote file servers depending on your infrastructure requirements.
The section is organized into two tabs: Settings for configuring storage backends and Explorer for browsing and managing the files stored within them.
Settings
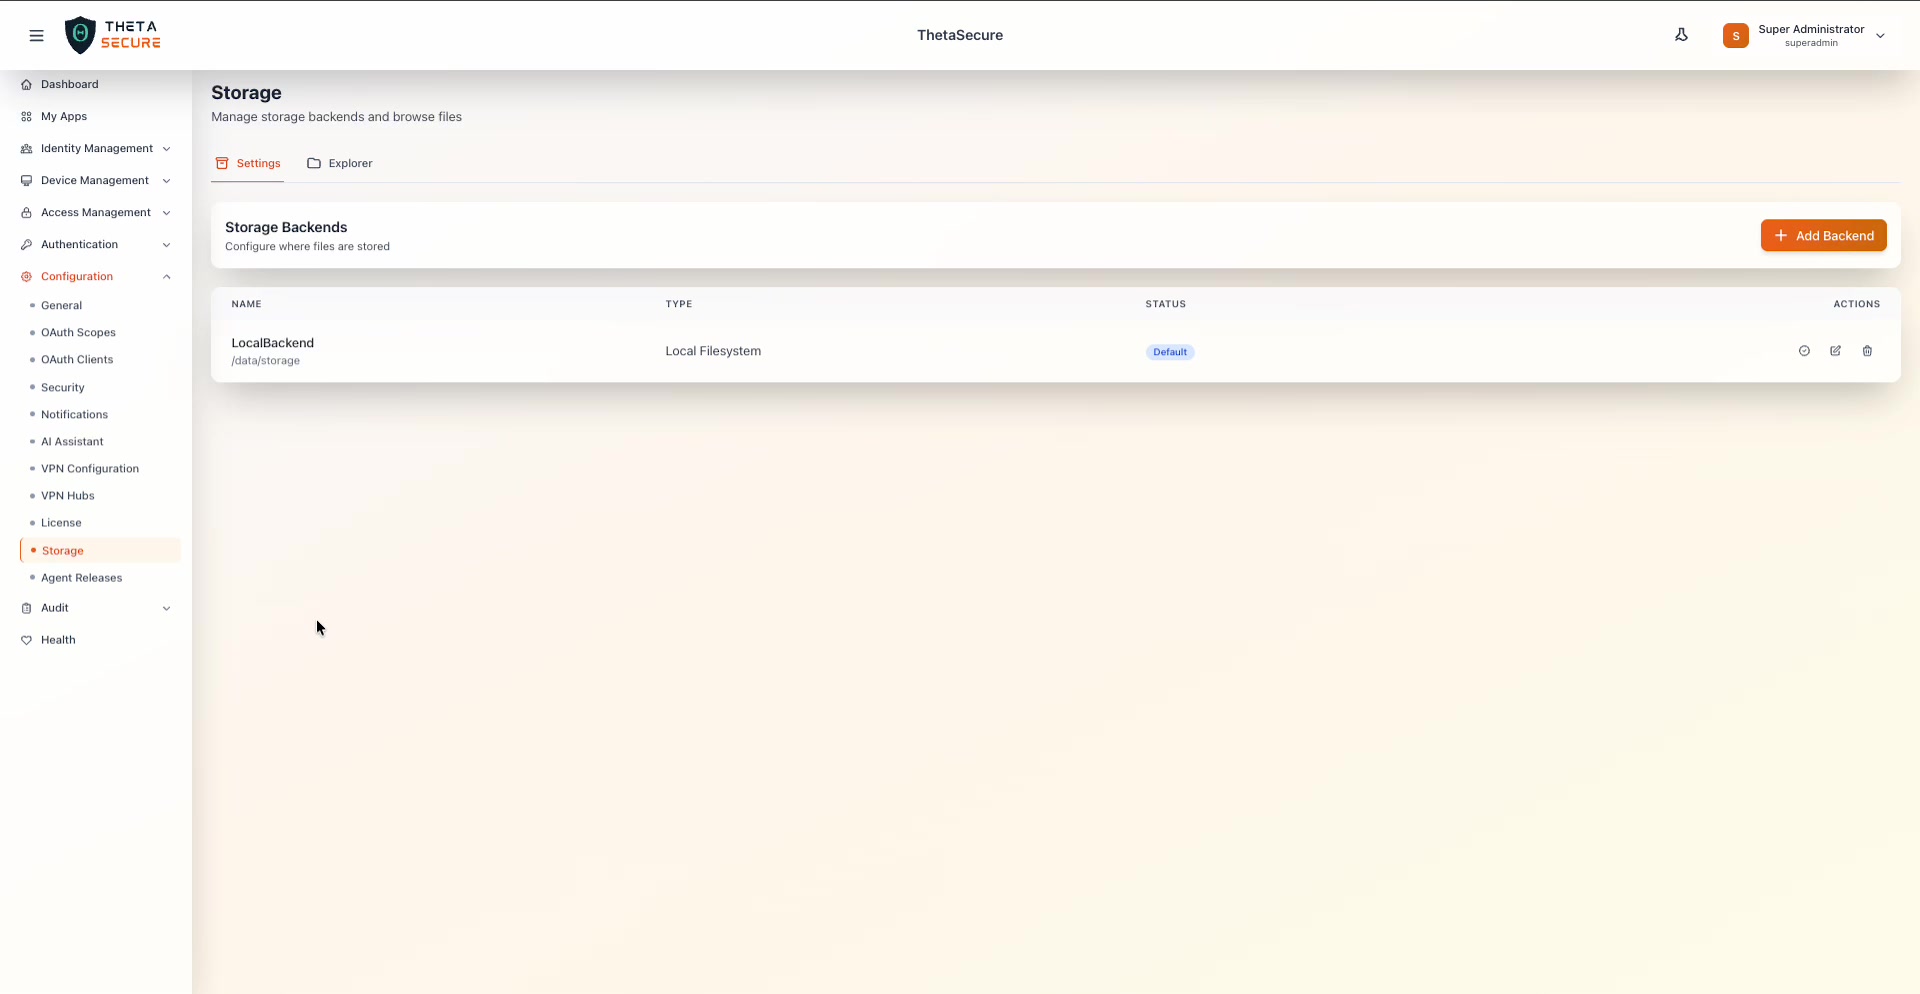
The Settings tab shows the Storage Backends table, which lists every storage destination configured in your ThetaSecure instance.
 The Settings tab with the Storage Backends table. The default backend is named "LocalBackend" and uses the Local Filesystem type at the path
 /data/storage. The Status column shows a "Default" badge, and the Actions column provides icons for testing the connection, editing, and deleting the backend.
Backend Table Columns
| Column | Description |
|---|---|
| Name | The friendly name of the storage backend (e.g., LocalBackend). The storage path or bucket name is shown below the name. |
| Type | The backend type: Local Filesystem, Amazon S3 / S3-Compatible, FTP Server, or SFTP Server. |
| Status | Shows a Default badge on the backend that ThetaSecure uses when no specific backend is requested. You can have multiple backends but only one default. |
| Actions | Three icons: the connection test icon (circle with signal), the edit icon (pencil), and the delete icon (trash can). |
Testing a Connection
Click the connection test icon on any backend row to verify that ThetaSecure can reach the storage destination and read/write files. A green toast notification appears at the bottom right confirming the result.
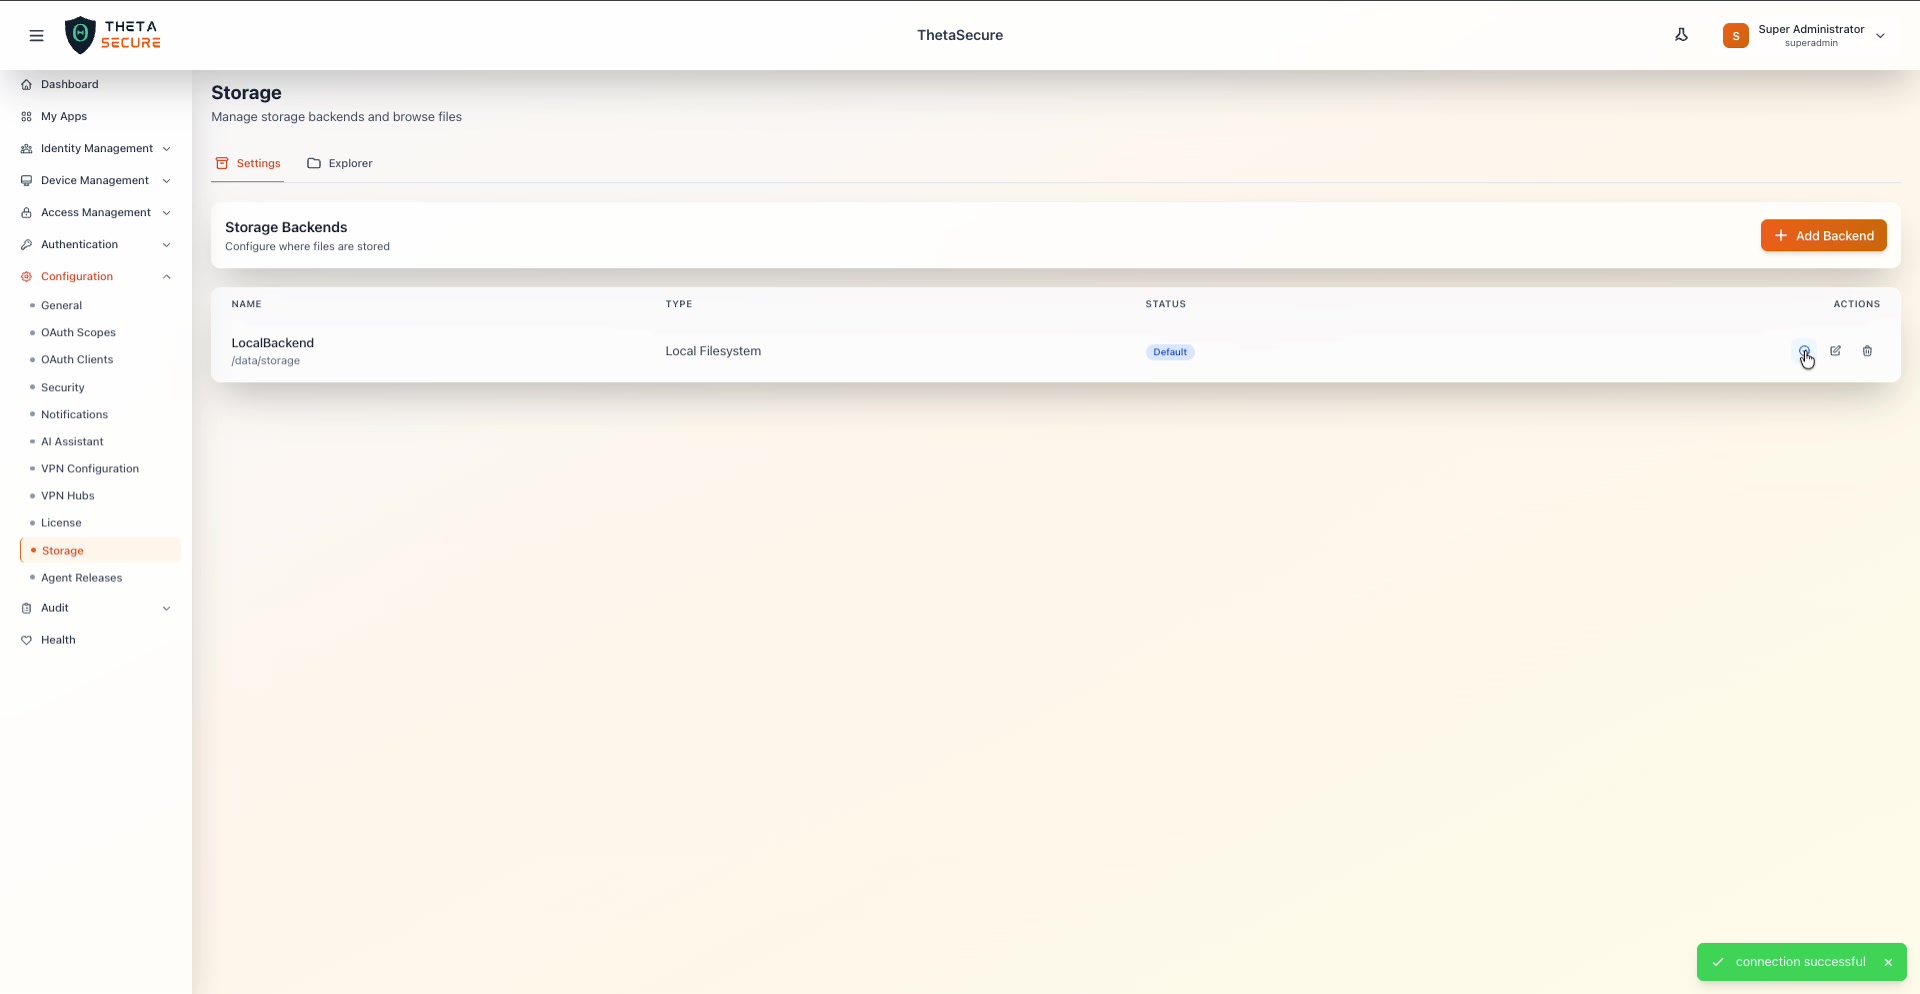 After clicking the connection test icon, a green "connection successful" notification appears at the bottom right of the screen, confirming the backend is reachable and operational.
Adding a Backend
Click + Add Backend in the upper right corner to open the configuration panel. The form fields change based on the backend type you select.
Backend Types
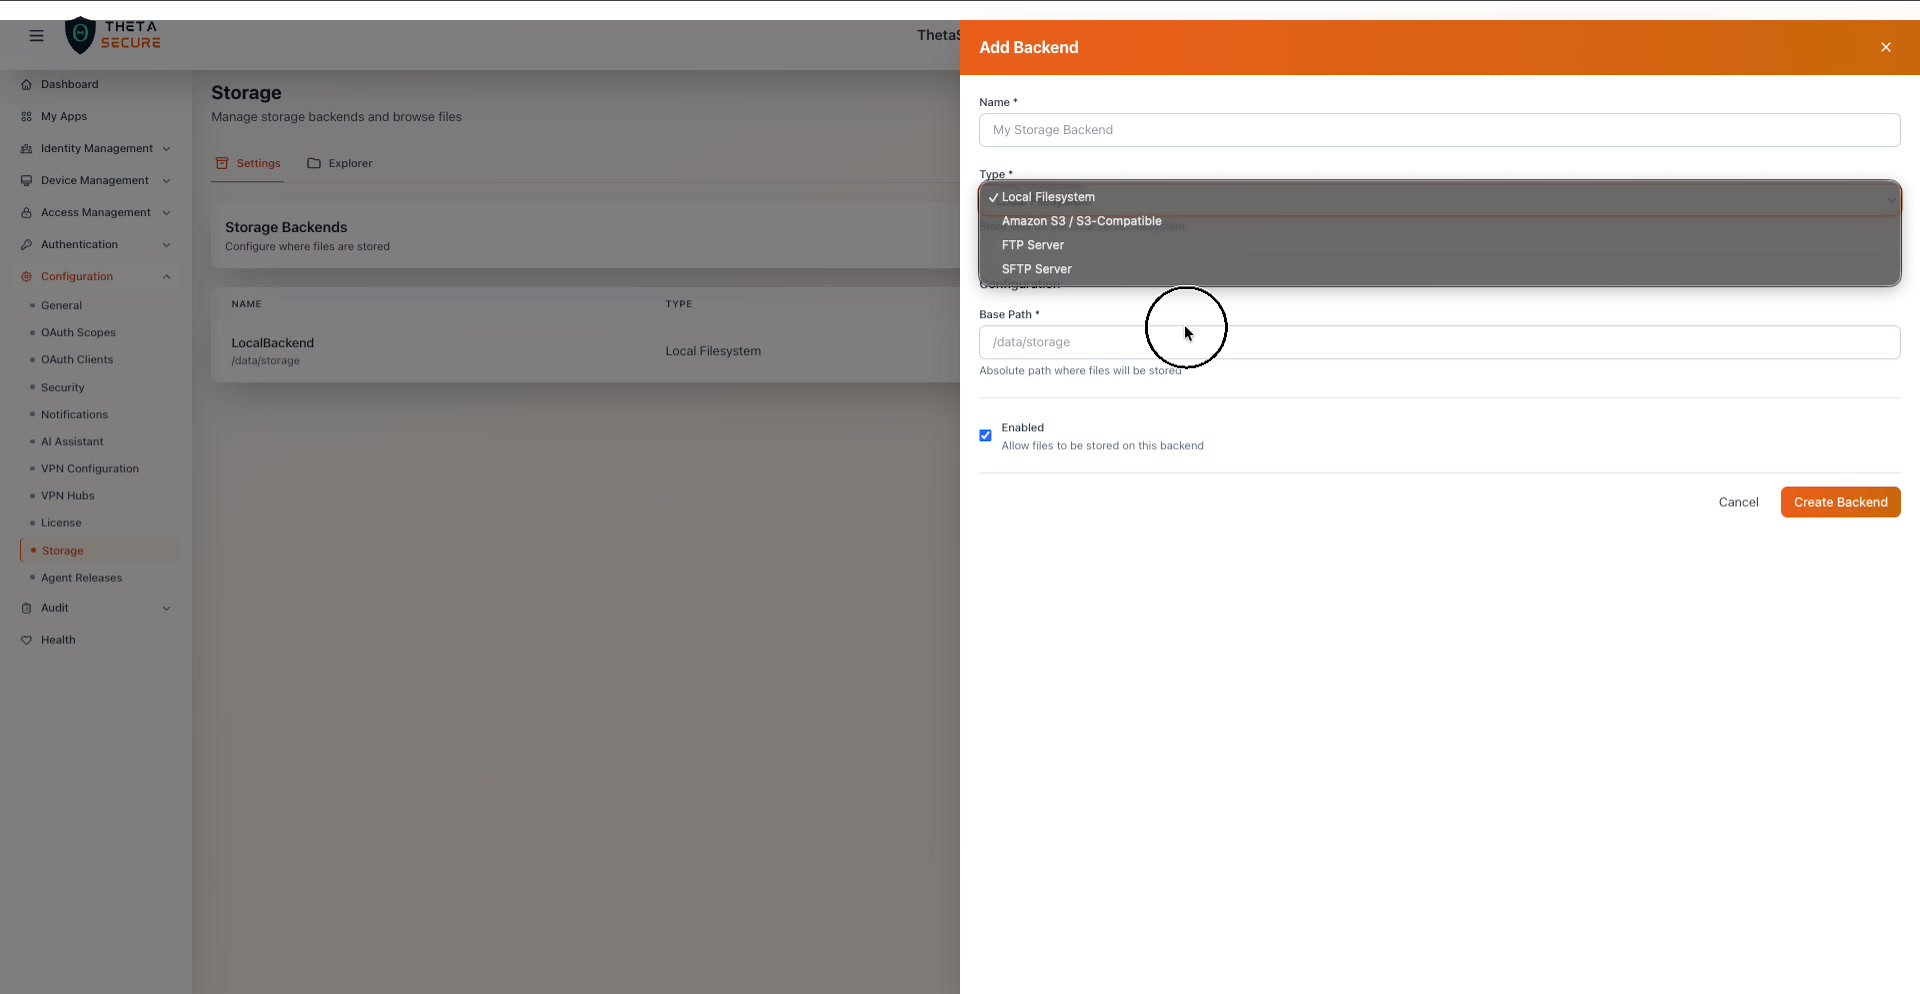 The Type dropdown in the Add Backend panel offers four storage options: Local Filesystem, Amazon S3 / S3-Compatible, FTP Server, and SFTP Server.
| Type | Description | Best For |
|---|---|---|
| Local Filesystem | Stores files directly on the ThetaSecure server's disk. | Single-server deployments, development environments, or air-gapped networks with no cloud access. |
| Amazon S3 / S3-Compatible | Stores files in Amazon S3 or any S3-compatible object store (MinIO, Wasabi, DigitalOcean Spaces, etc.). | Production deployments that require durability, scalability, and off-server backup. |
| FTP Server | Stores files on a remote FTP server. | Legacy environments that already have FTP infrastructure in place. |
| SFTP Server | Stores files on a remote server via the SSH File Transfer Protocol. | Environments that require encrypted file transfers to remote storage. |
Local Filesystem Configuration
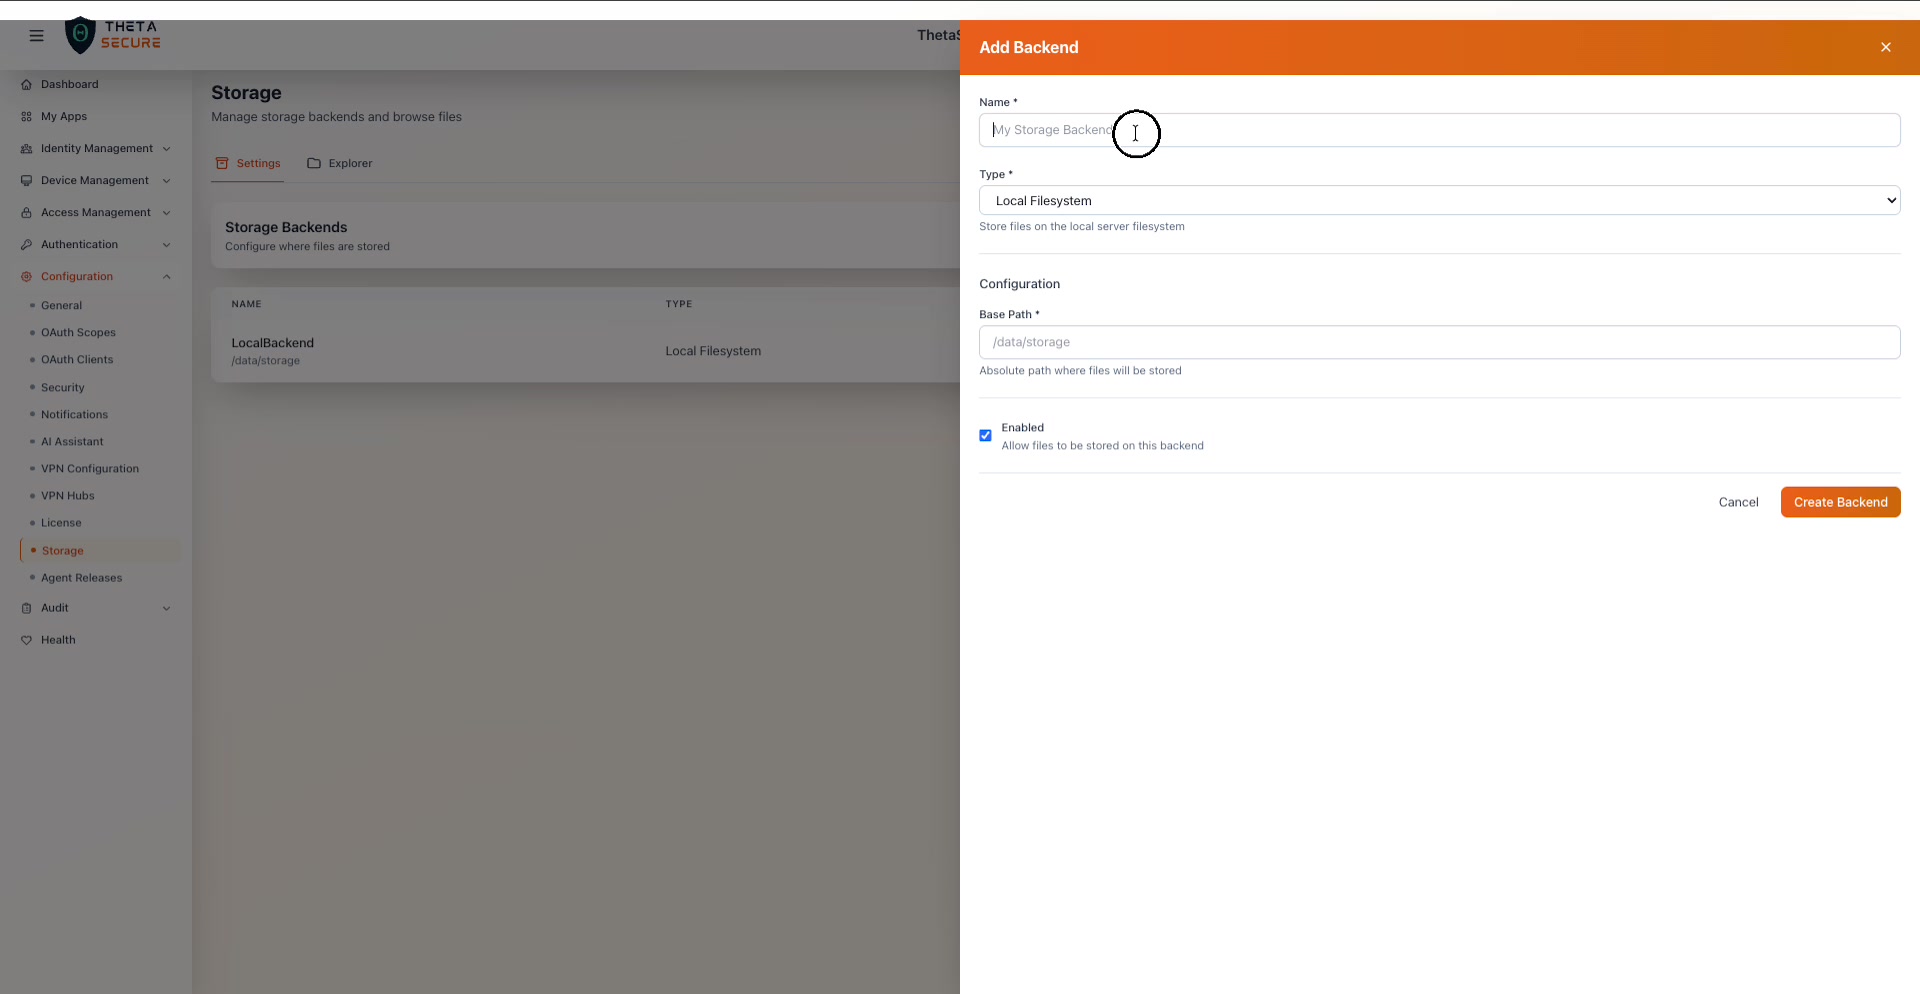 The Add Backend panel configured for Local Filesystem. The form requires a Name, shows the Type description "Store files on the local server filesystem", and provides a Base Path field with an Enabled checkbox.
| Field | Required | Description |
|---|---|---|
| Name | Yes | A friendly name for the backend (e.g., LocalBackend, PrimaryStorage). |
| Type | Yes | Select Local Filesystem. |
| Base Path | Yes | The absolute filesystem path where ThetaSecure will store files (e.g., /data/storage). The directory must exist and be writable by the ThetaSecure process. |
| Enabled | — | Checkbox to allow files to be stored on this backend. Uncheck to temporarily disable the backend without deleting it. |
Amazon S3 / S3-Compatible Configuration
When you select Amazon S3 / S3-Compatible, the form presents the following fields:
| Field | Required | Description |
|---|---|---|
| Name | Yes | A friendly name for the backend. |
| Bucket | Yes | The S3 bucket name. |
| Region | Yes | The AWS region (e.g., us-east-1) or the region of your S3-compatible provider. |
| Access Key ID | Yes | The AWS IAM or S3-compatible access key. |
| Secret Access Key | Yes | The corresponding secret key. |
| Endpoint URL | No | For S3-compatible services (MinIO, Wasabi, etc.), provide the custom endpoint URL. Leave blank for AWS S3. |
| Path Prefix | No | An optional prefix (folder path) within the bucket where files will be stored. |
| Enabled | — | Checkbox to enable or disable the backend. |
FTP Server Configuration
| Field | Required | Description |
|---|---|---|
| Name | Yes | A friendly name for the backend. |
| Host | Yes | The FTP server hostname or IP address. |
| Port | Yes | The FTP port (default: 21). |
| Username | No | The FTP authentication username. |
| Password | No | The FTP authentication password. |
| Base Path | No | The directory on the FTP server where files will be stored. |
| Enabled | — | Checkbox to enable or disable the backend. |
SFTP Server Configuration
| Field | Required | Description |
|---|---|---|
| Name | Yes | A friendly name for the backend. |
| Host | Yes | The SFTP server hostname or IP address. |
| Port | Yes | The SSH port (default: 22). |
| Username | Yes | The SSH username. |
| Password / Private Key | Yes | Either the SSH password or the private key for key-based authentication. |
| Base Path | No | The remote directory where files will be stored. |
| Enabled | — | Checkbox to enable or disable the backend. |
Click Create Backend to save the configuration. ThetaSecure validates the connection before creating the entry.
Explorer
The Explorer tab is a full-featured file browser that lets you navigate, search, upload, download, and share files stored across all configured backends.
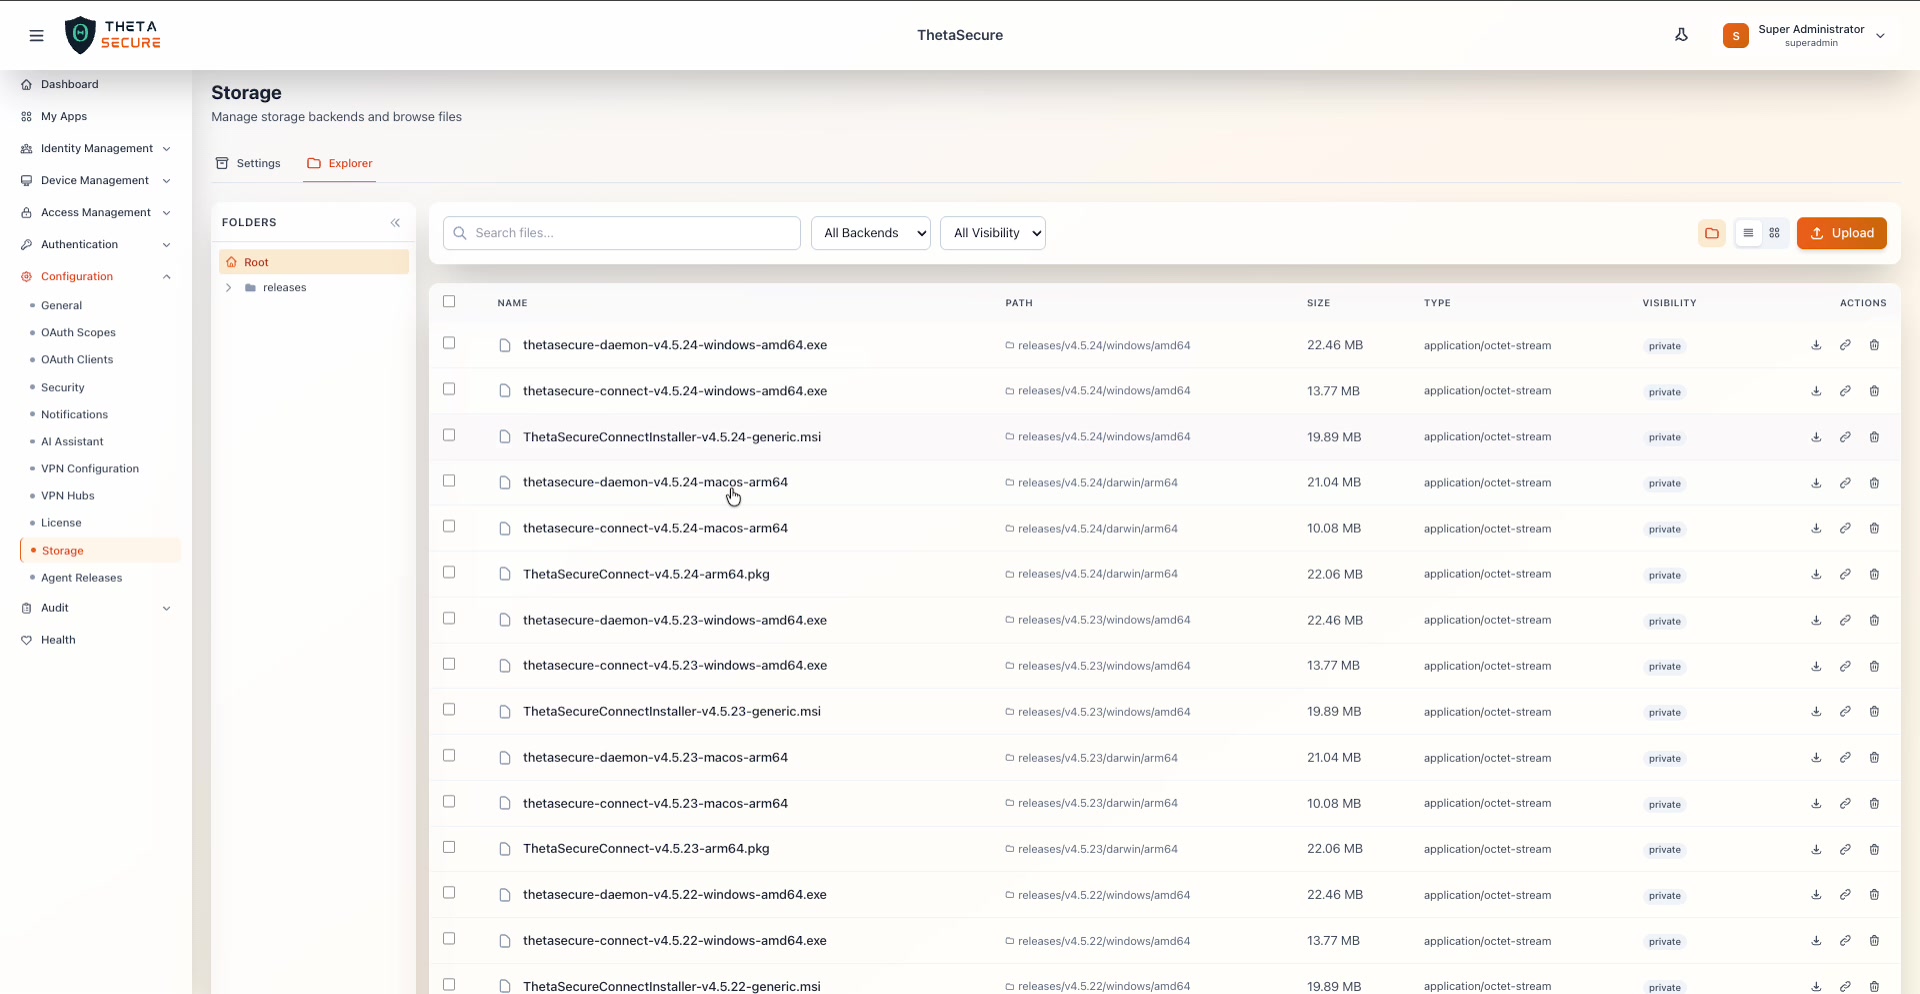 The Explorer tab. The left panel shows the FOLDERS tree with a Root node and a "releases" subfolder. The main area lists files with columns for Name, Path, Size, Type, Visibility, and Actions (download, edit, delete). The toolbar at the top provides search, backend filtering, visibility filtering, view mode toggles, and an Upload button.
Folder Navigation
The left panel shows a collapsible folder tree. Click any folder to navigate into it and view its contents. The breadcrumb trail at the top of the file list (e.g., Root > releases > v4.5.11) shows your current location and lets you jump back to any parent folder.
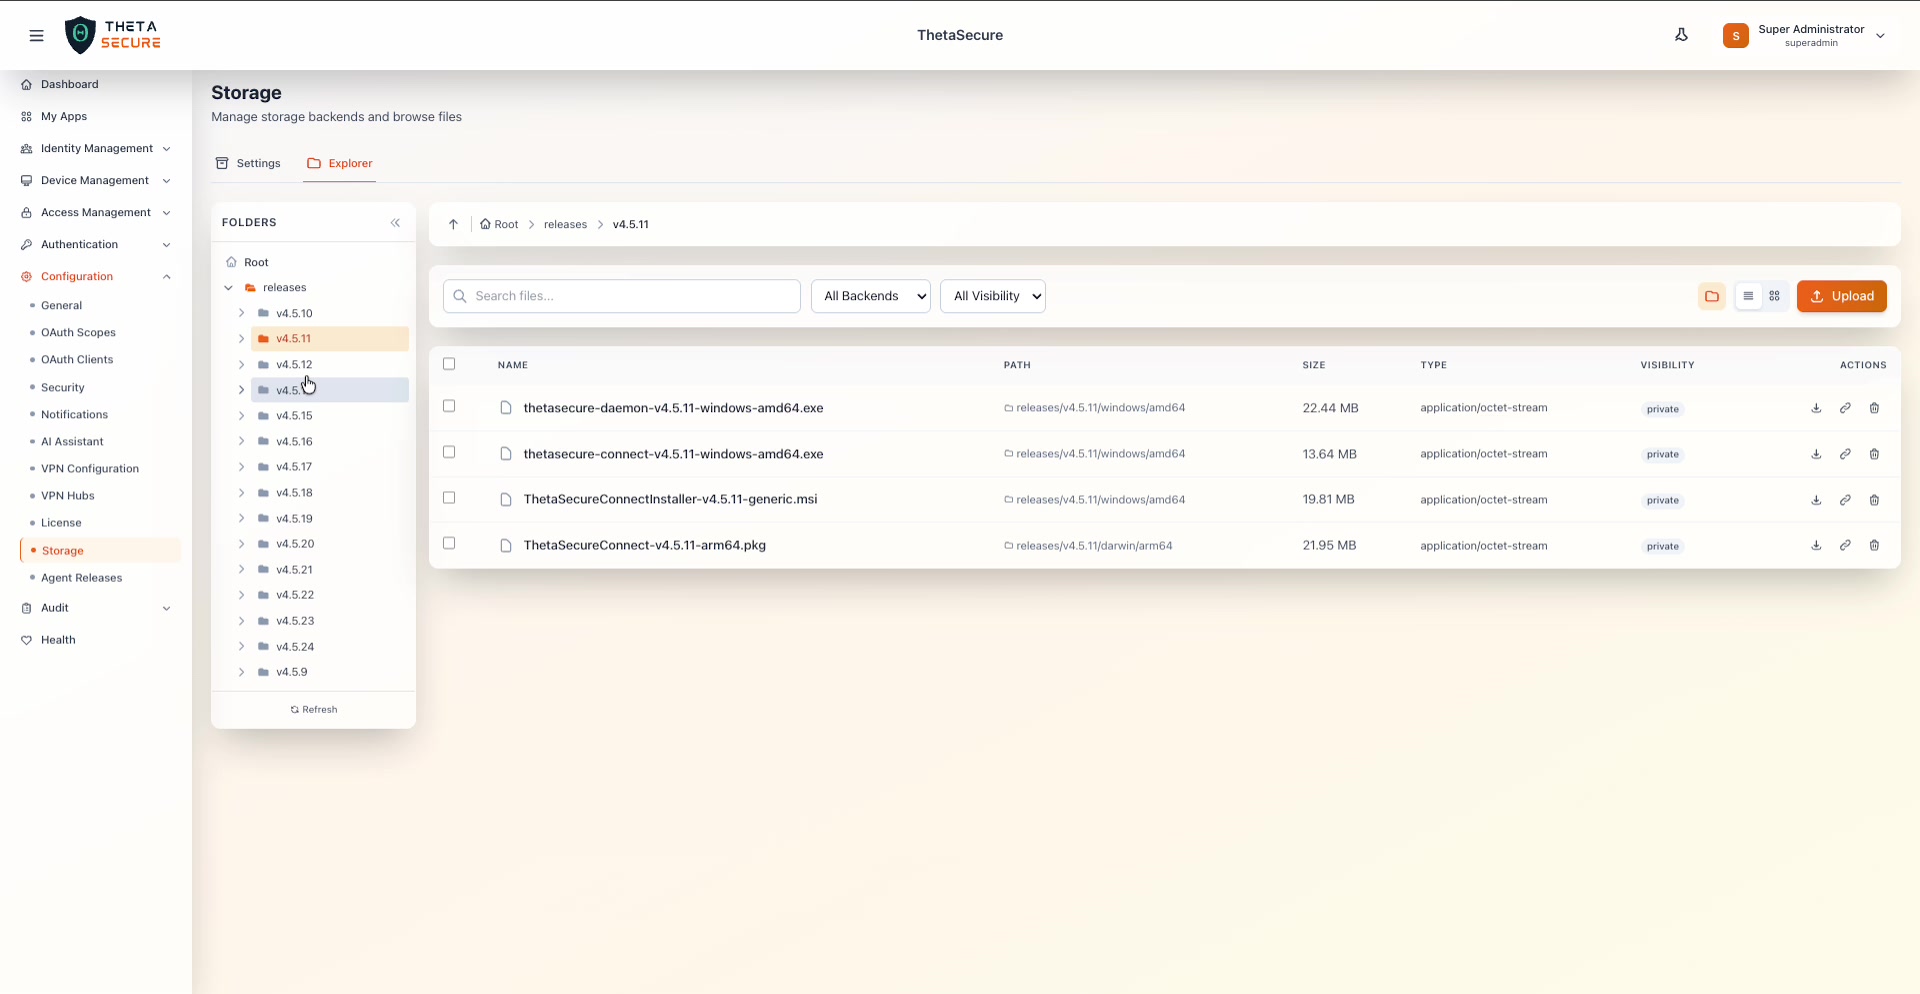 Navigating into releases > v4.5.11 shows the agent binaries for that version: Windows daemon and connect executables, a Windows MSI installer, and a macOS .pkg package. The folder tree on the left expands to show all version folders from v4.5.9 through v4.5.24.
File Table Columns
| Column | Description |
|---|---|
| Name | The filename. Checkboxes on the left allow multi-select for bulk operations. |
| Path | The full storage path within the backend (e.g., releases/v4.5.24/windows/amd64). |
| Size | The file size in human-readable format (e.g., 22.46 MB). |
| Type | The MIME type of the file (e.g., application/octet-stream for binary files). |
| Visibility | Whether the file is private (accessible only through authenticated ThetaSecure sessions) or public (accessible via a direct URL). |
| Actions | Icons for downloading the file, editing its metadata, and deleting it. |
Searching and Filtering
The toolbar at the top of the Explorer provides several filtering options. The Search files bar lets you filter by filename. The All Backends dropdown filters files by storage backend when you have multiple backends configured. The All Visibility dropdown filters between private and public files. Three view mode toggles on the right switch between thumbnail, list, and grid views.
Uploading Files
Click the Upload button to open the Upload Files dialog.
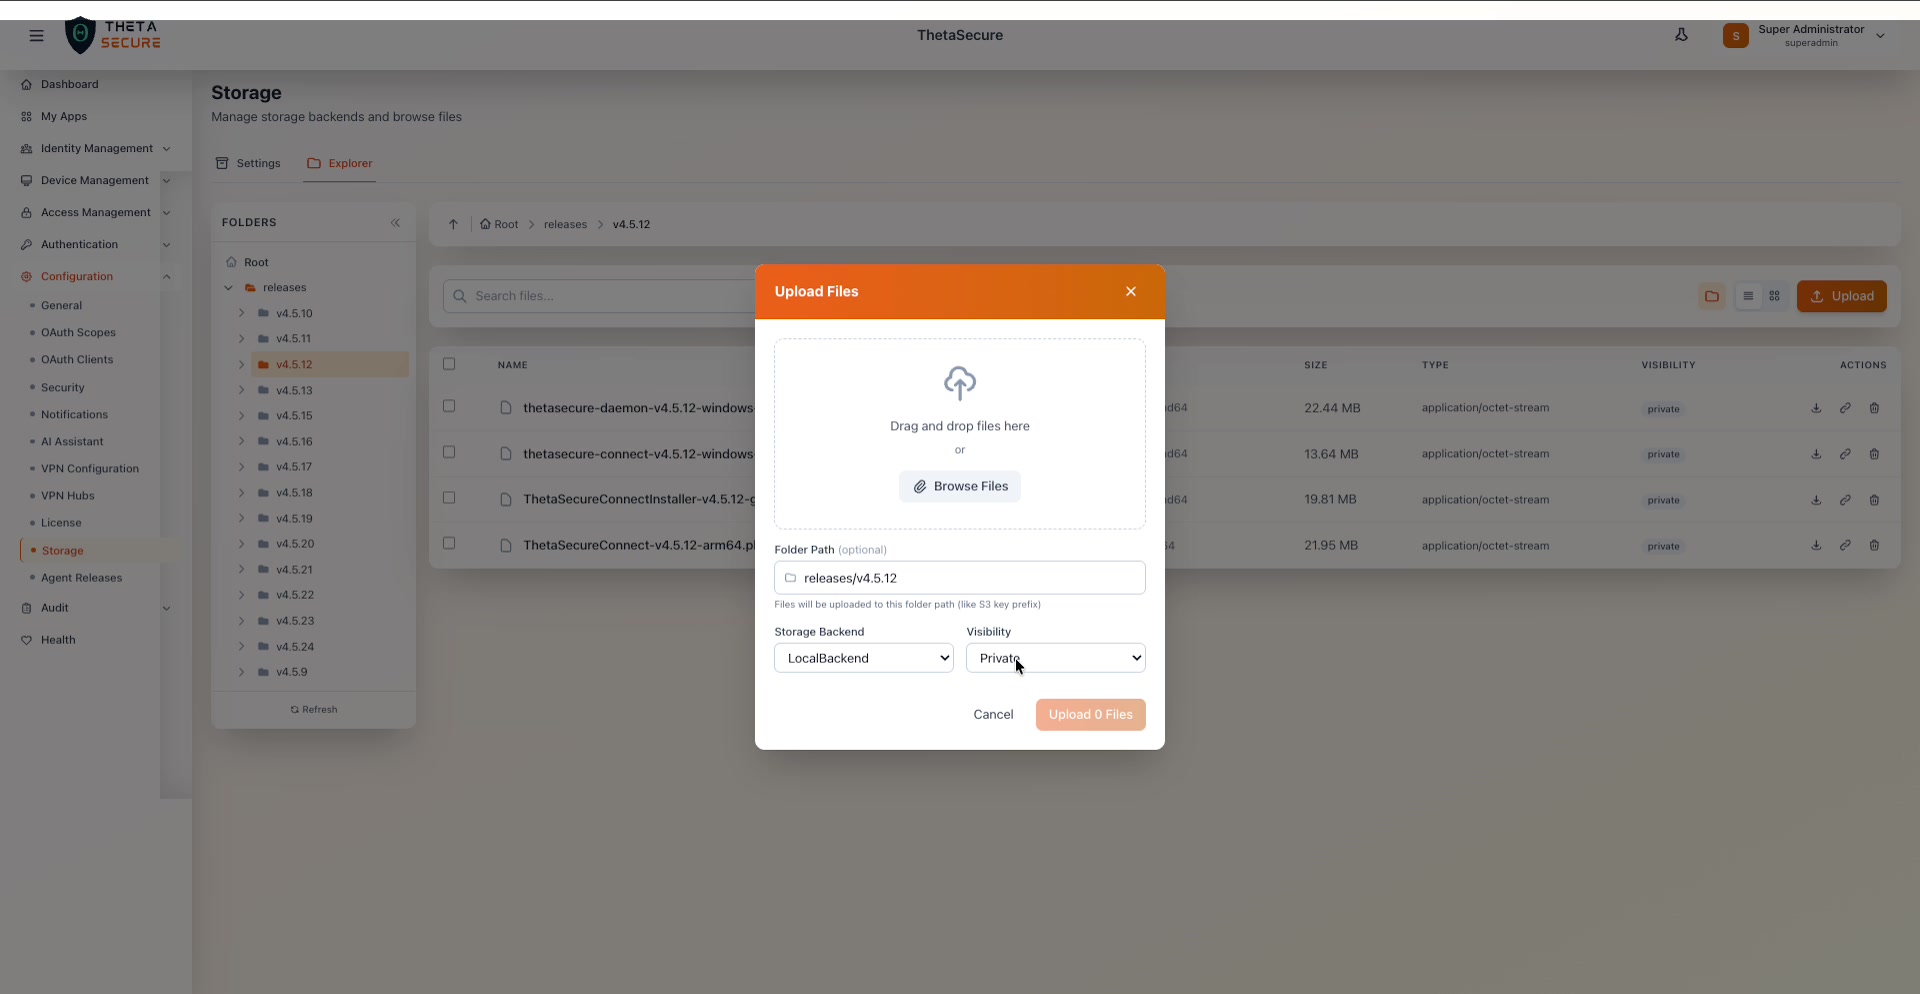 The Upload Files dialog. The top area supports drag-and-drop or Browse Files selection. Below that, the Folder Path field shows the current location (pre-filled based on the folder you navigated to). The Storage Backend and Visibility dropdowns let you choose where and how to store the uploaded files.
| Field | Description |
|---|---|
| Drag and drop area | Drop files directly into this area or click Browse Files to open the file picker. |
| Folder Path | The destination path within the storage backend. This is pre-filled with your current Explorer location but can be changed. It works like an S3 key prefix. |
| Storage Backend | Select which configured backend to store the files in (e.g., LocalBackend). |
| Visibility | Choose Private or Public for the uploaded files. |
Click Upload to begin the transfer.
Generating Signed URLs
For private files that need to be shared temporarily with external users, the Explorer supports signed URL generation. Click the edit (pencil) icon on a file row and select the signed URL option to open the generation dialog.
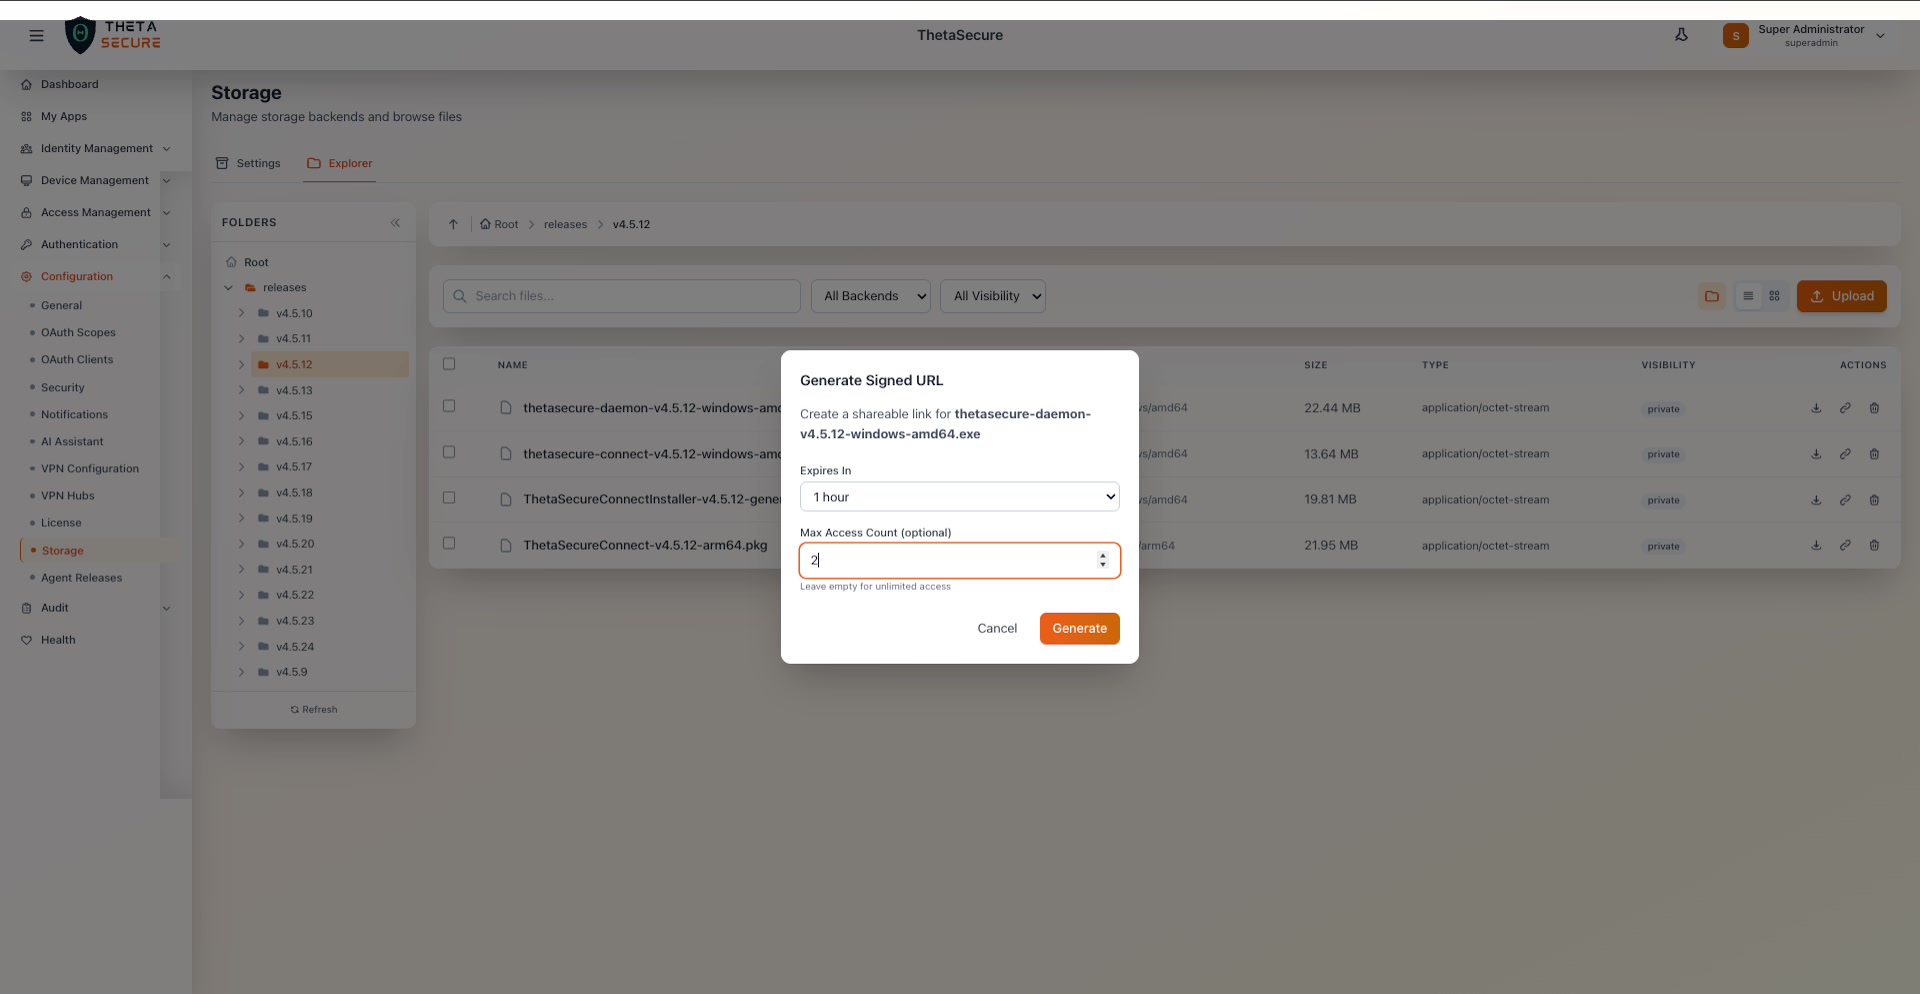 The Generate Signed URL dialog for a Windows agent binary. Configure the expiration time (defaulting to 1 hour) and an optional Max Access Count to limit the number of times the link can be used. Leave the count empty for unlimited access within the expiry window.
| Field | Description |
|---|---|
| Expires In | How long the signed URL remains valid. Options include 1 hour, 24 hours, 7 days, and custom durations. |
| Max Access Count | An optional limit on the number of times the URL can be accessed. Leave empty for unlimited downloads within the expiry period. |
Click Generate to create the signed URL. Copy the resulting URL and share it with the intended recipient. Once the URL expires or the access count is exhausted, the link stops working.
Use signed URLs to distribute agent installers to end users who do not have ThetaSecure console access. Set a reasonable expiry (24 hours is usually sufficient for a deployment push) and a max access count that matches the number of target devices to prevent URL reuse beyond its intended scope.
When configuring S3 or SFTP backends, ensure the credentials have the minimum required permissions (read, write, list, delete on the specific bucket or directory). Overly broad credentials increase the blast radius if they are ever compromised.