OAuth Clients
OAuth Clients represent the applications and services that authenticate with ThetaSecure using the OAuth 2.0 protocol. Each client has a unique Client ID and Client Secret that it uses to obtain access tokens for API communication.
Navigate to Configuration > OAuth Clients to manage your clients.
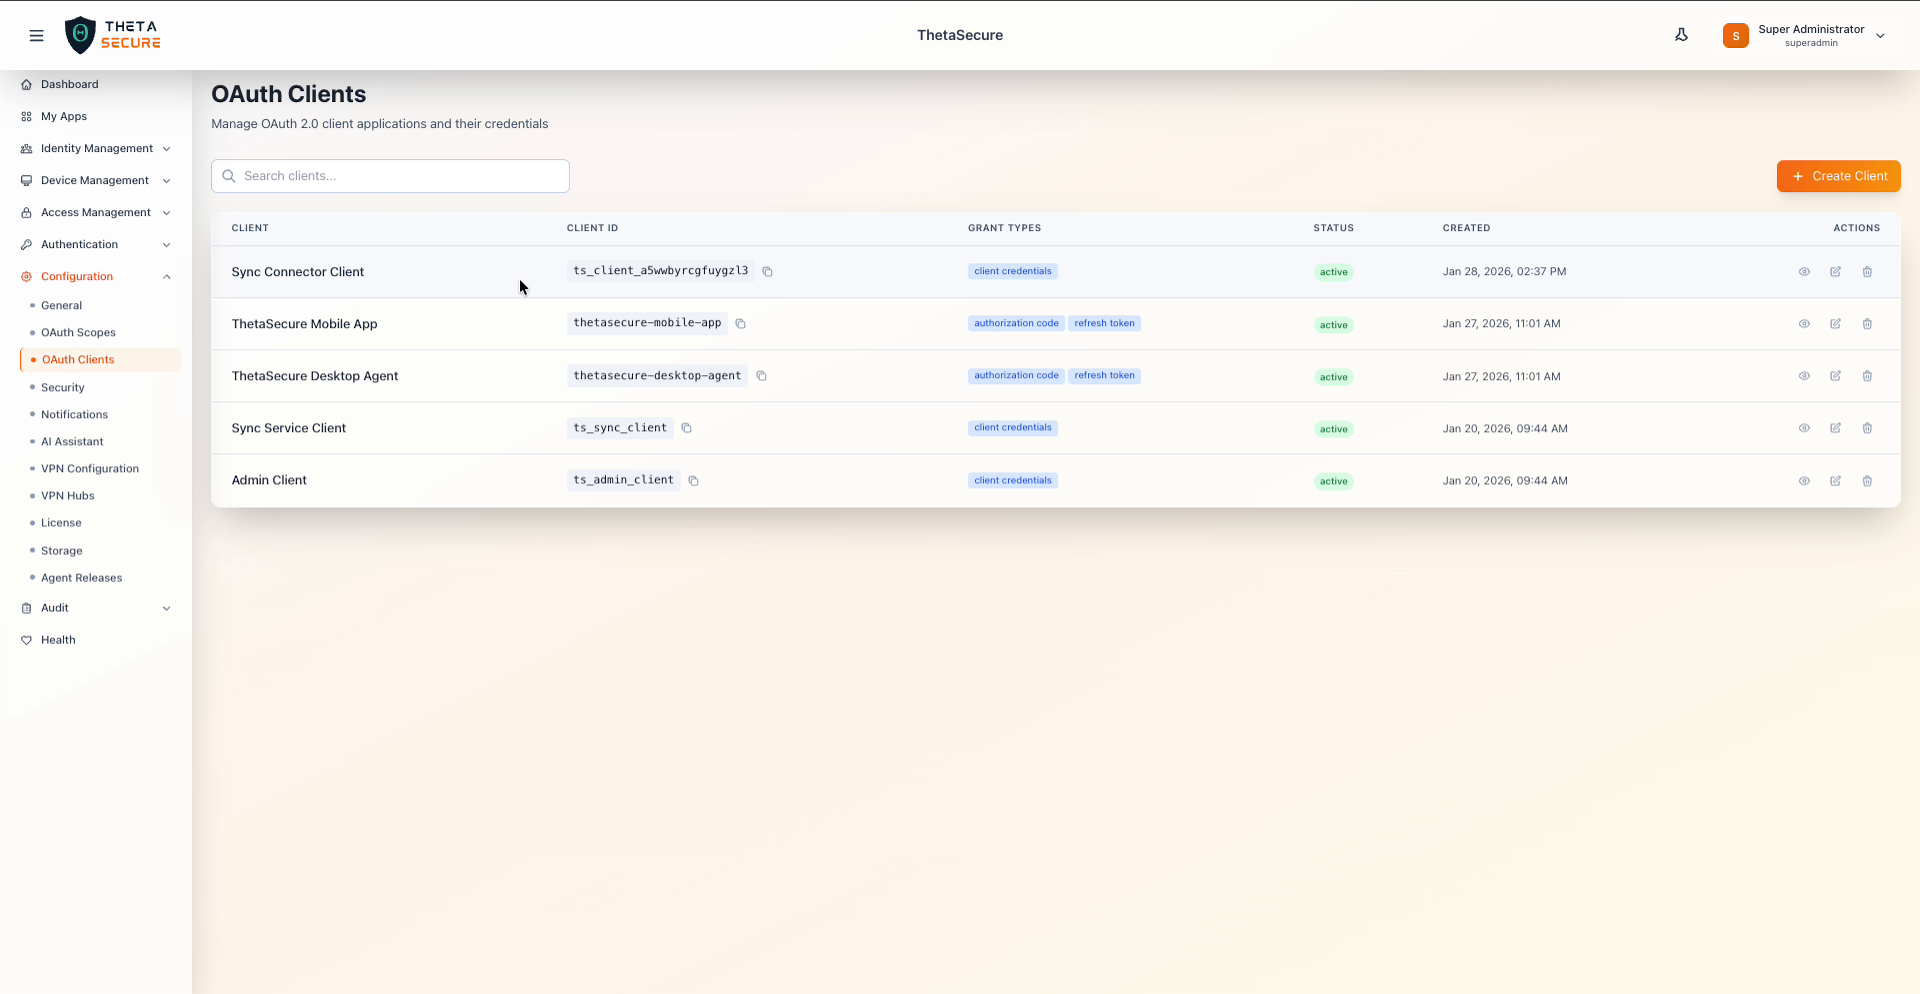 OAuth Clients list with client names, IDs, grant types, and status
Client List
The client list displays all registered OAuth applications in a searchable table. Use the search bar to filter clients by name. Each row shows the client name, its generated Client ID (with a copy button), the grant types assigned, current status, creation date, and action icons for viewing, editing, and deleting.
| Column | Description |
|---|---|
| Client | Display name of the OAuth client application. |
| Client ID | System generated identifier used by the application during authentication. Click the copy icon to copy it to your clipboard. |
| Grant Types | The OAuth 2.0 flows this client is authorized to use, shown as badges (for example, client credentials or authorization code and refresh token). |
| Status | Current state of the client, typically active. |
| Created | Timestamp when the client was registered. |
| Actions | View details, edit, or delete the client. |
Default Clients
ThetaSecure provisions several clients automatically during initial setup.
| Client | Client ID | Grant Type | Purpose |
|---|---|---|---|
| Admin Client | ts_admin_client | client credentials | Administrative API access for platform management operations. |
| Sync Service Client | ts_sync_client | client credentials | Internal service communication for directory synchronization. |
| ThetaSecure Mobile App | thetasecure-mobile-app | authorization code, refresh token | End user authentication from the ThetaSecure mobile application. |
| ThetaSecure Desktop Agent | thetasecure-desktop-agent | authorization code, refresh token | End user authentication from the ThetaSecure desktop agent. |
Avoid modifying or deleting the default clients. These are required for core platform functionality including mobile authentication, desktop agent connectivity, and directory synchronization.
Creating a Client
Click + Create Client to register a new OAuth application. ThetaSecure presents two client type options.
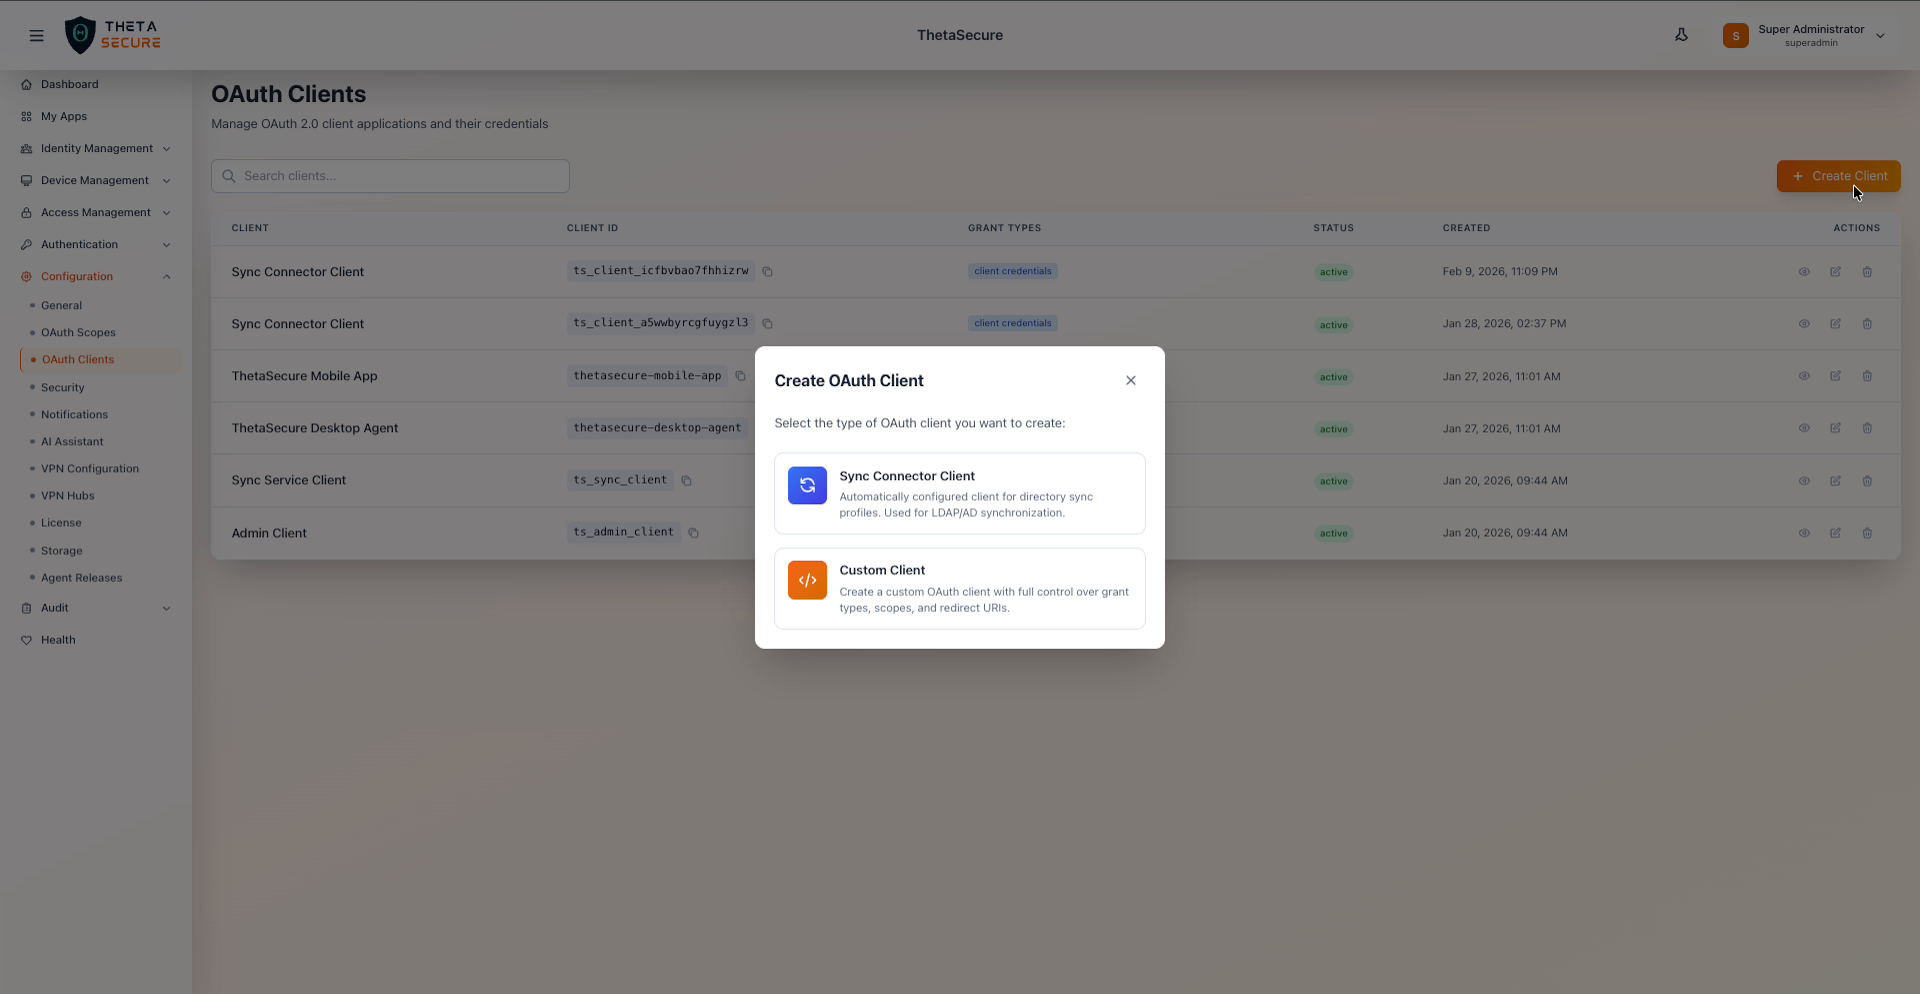 Client type selection: Sync Connector Client for directory sync or Custom Client for full control
Sync Connector Client is automatically configured with the correct grant types and scopes for LDAP/AD directory synchronization. Choose this when setting up a new directory sync profile.
Custom Client gives you full control over grant types, scopes, and redirect URIs. Use this for custom integrations, third party applications, or any service that needs API access beyond directory sync.
Custom Client Form
Selecting Custom Client opens the full configuration panel.
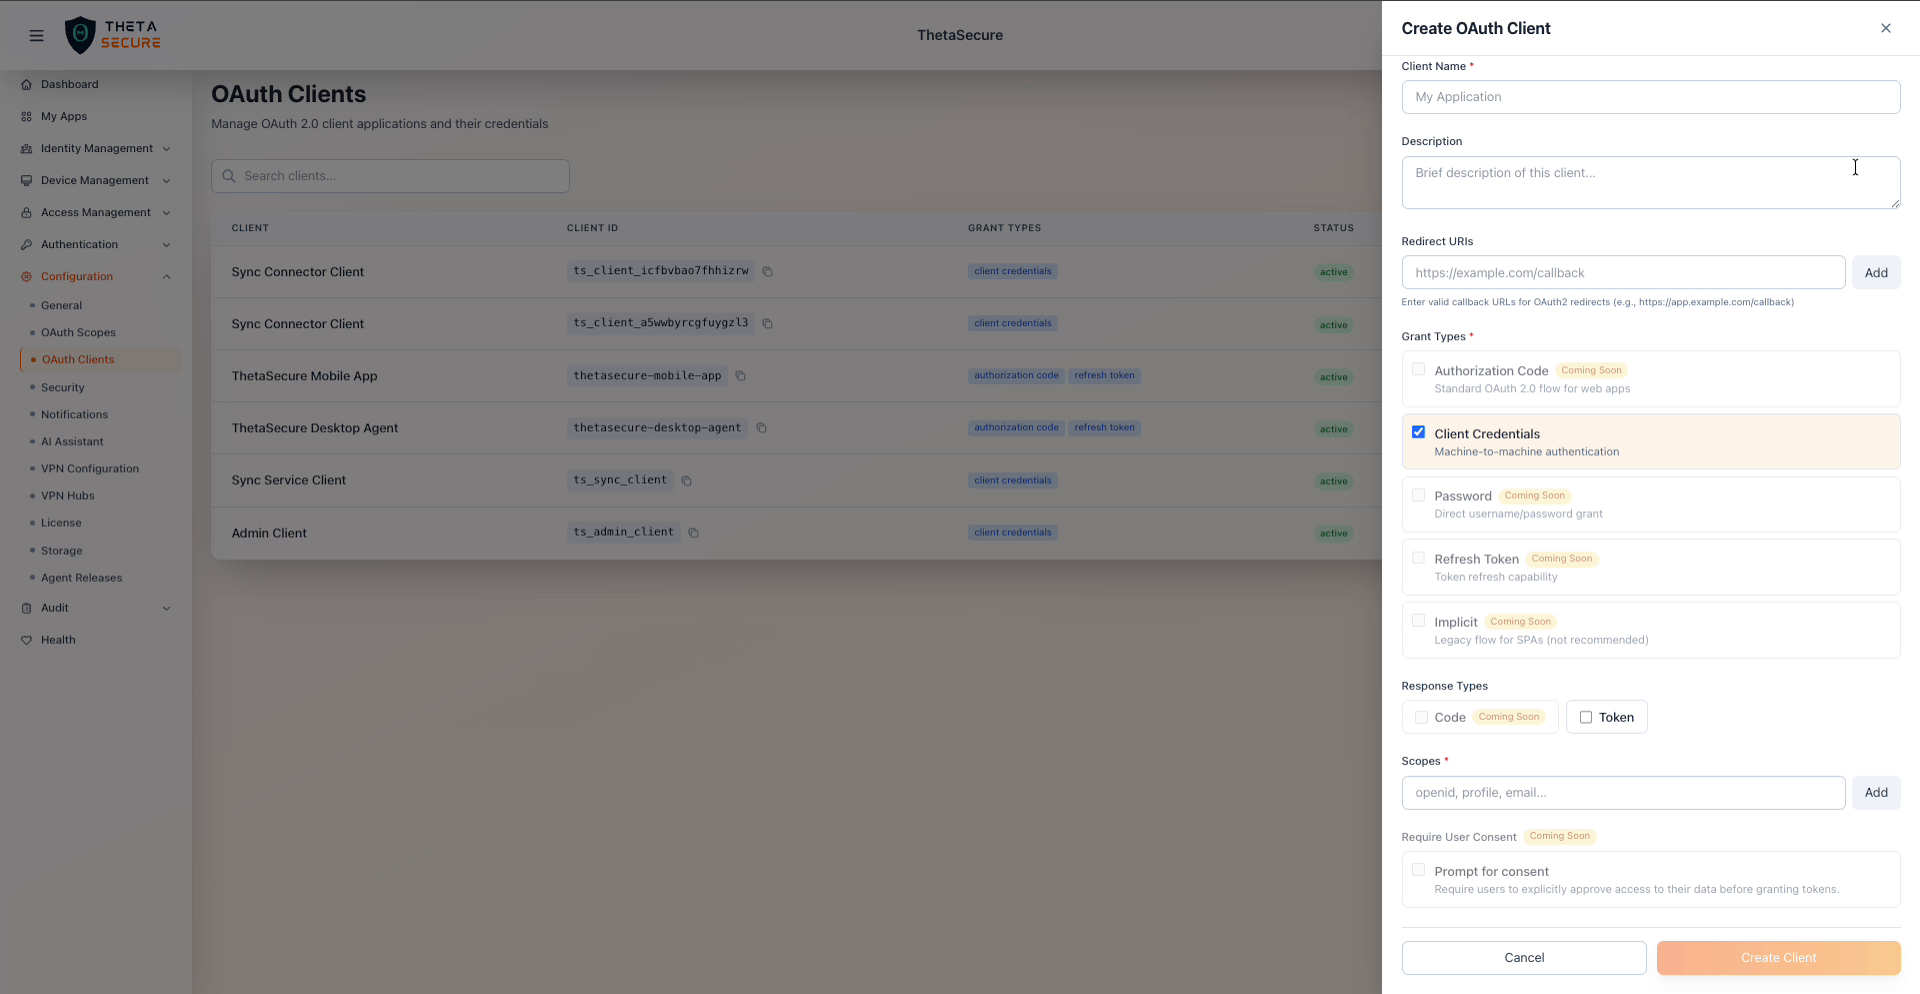 Custom Client creation form with grant types, scopes, and redirect URI fields
| Field | Required | Description |
|---|---|---|
| Client Name | Yes | A human readable name to identify this client in the list. |
| Description | No | Brief description of the client's purpose. |
| Redirect URIs | No | Callback URLs for OAuth2 redirects. Required for Authorization Code flow. Enter valid HTTPS URLs (for example, https://app.example.com/callback) and click Add for each URI. |
| Grant Types | Yes | Select one or more OAuth 2.0 flows. See the Grant Types table below. |
| Response Types | No | Token response formats. Token is available; Code is marked Coming Soon. |
| Scopes | Yes | API permissions the client can request. Enter scope names (for example, openid, profile, email) and click Add. See OAuth Scopes for available values. |
| Require User Consent | No | When enabled, users must explicitly approve access before tokens are granted. Marked Coming Soon. |
Grant Types
| Grant Type | Status | Description |
|---|---|---|
| Authorization Code | Available | Standard OAuth 2.0 flow for web applications. Requires a redirect URI and involves user interaction. |
| Client Credentials | Available | Machine to machine authentication with no user interaction. Suitable for backend services and automated processes. |
| Password | Coming Soon | Direct username/password grant. |
| Refresh Token | Coming Soon | Enables token refresh capability for long lived sessions. |
| Implicit | Coming Soon | Legacy flow for single page applications. Not recommended for new implementations. |
Click Create Client to register the application. The system generates a Client ID and Client Secret.
Client Details
After creating a client (or clicking the view icon on an existing client), the Client Details panel opens on the right side.
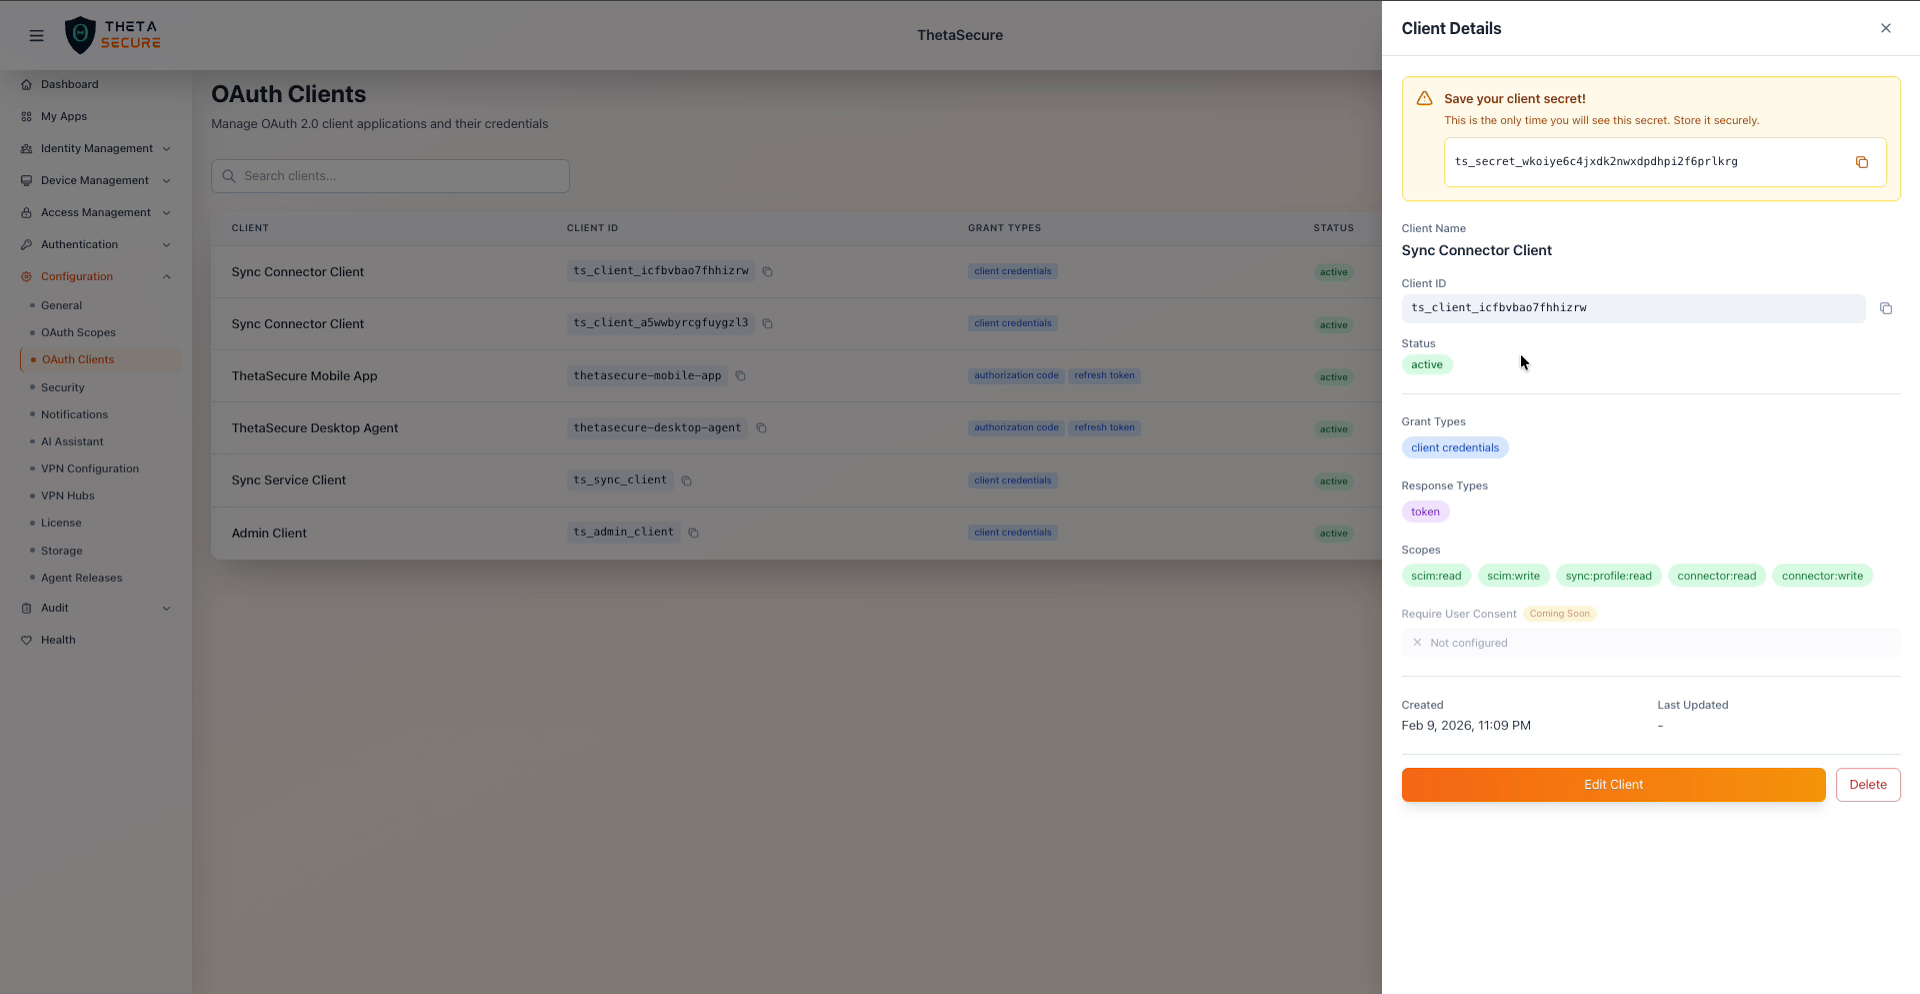 Client Details panel for a Sync Connector Client with secret, scopes, and metadata
The Client Secret is displayed only once at creation time. Copy it immediately and store it in a secure location such as a secrets manager or vault. If you lose the secret, you will need to delete and recreate the client.
The details panel displays the client name, Client ID, status, grant types, response types, assigned scopes (shown as badges), the Require User Consent setting, and timestamps for creation and last update. Use the Edit Client button to modify settings or Delete to remove the client.
Security Considerations
Treat Client Secrets with the same care as passwords. Never embed them in client side code, public repositories, or front end applications. For applications that run in browsers or on user devices, use the Authorization Code flow with PKCE rather than exposing client credentials. Rotate secrets periodically by creating a new client and migrating your integration, then deleting the old client.