Network Apps
Network Apps are at the heart of ThetaSecure's ZTNA (Zero Trust Network Access) capability. Where Web Apps handle browser based SSO, Network Apps define the private network resources that users access through the ThetaSecure agent's encrypted tunnels. Every internal server, database, file share, or network segment that you want to protect behind ZTNA is registered here as a Network App.
This is ThetaSecure's replacement for traditional VPN access. Instead of granting users a broad network tunnel that exposes your entire internal network, Network Apps let you define exactly which IP addresses, protocols, and ports each application needs. The ThetaSecure agent then builds a micro tunnel that provides access only to those specific endpoints, nothing more.
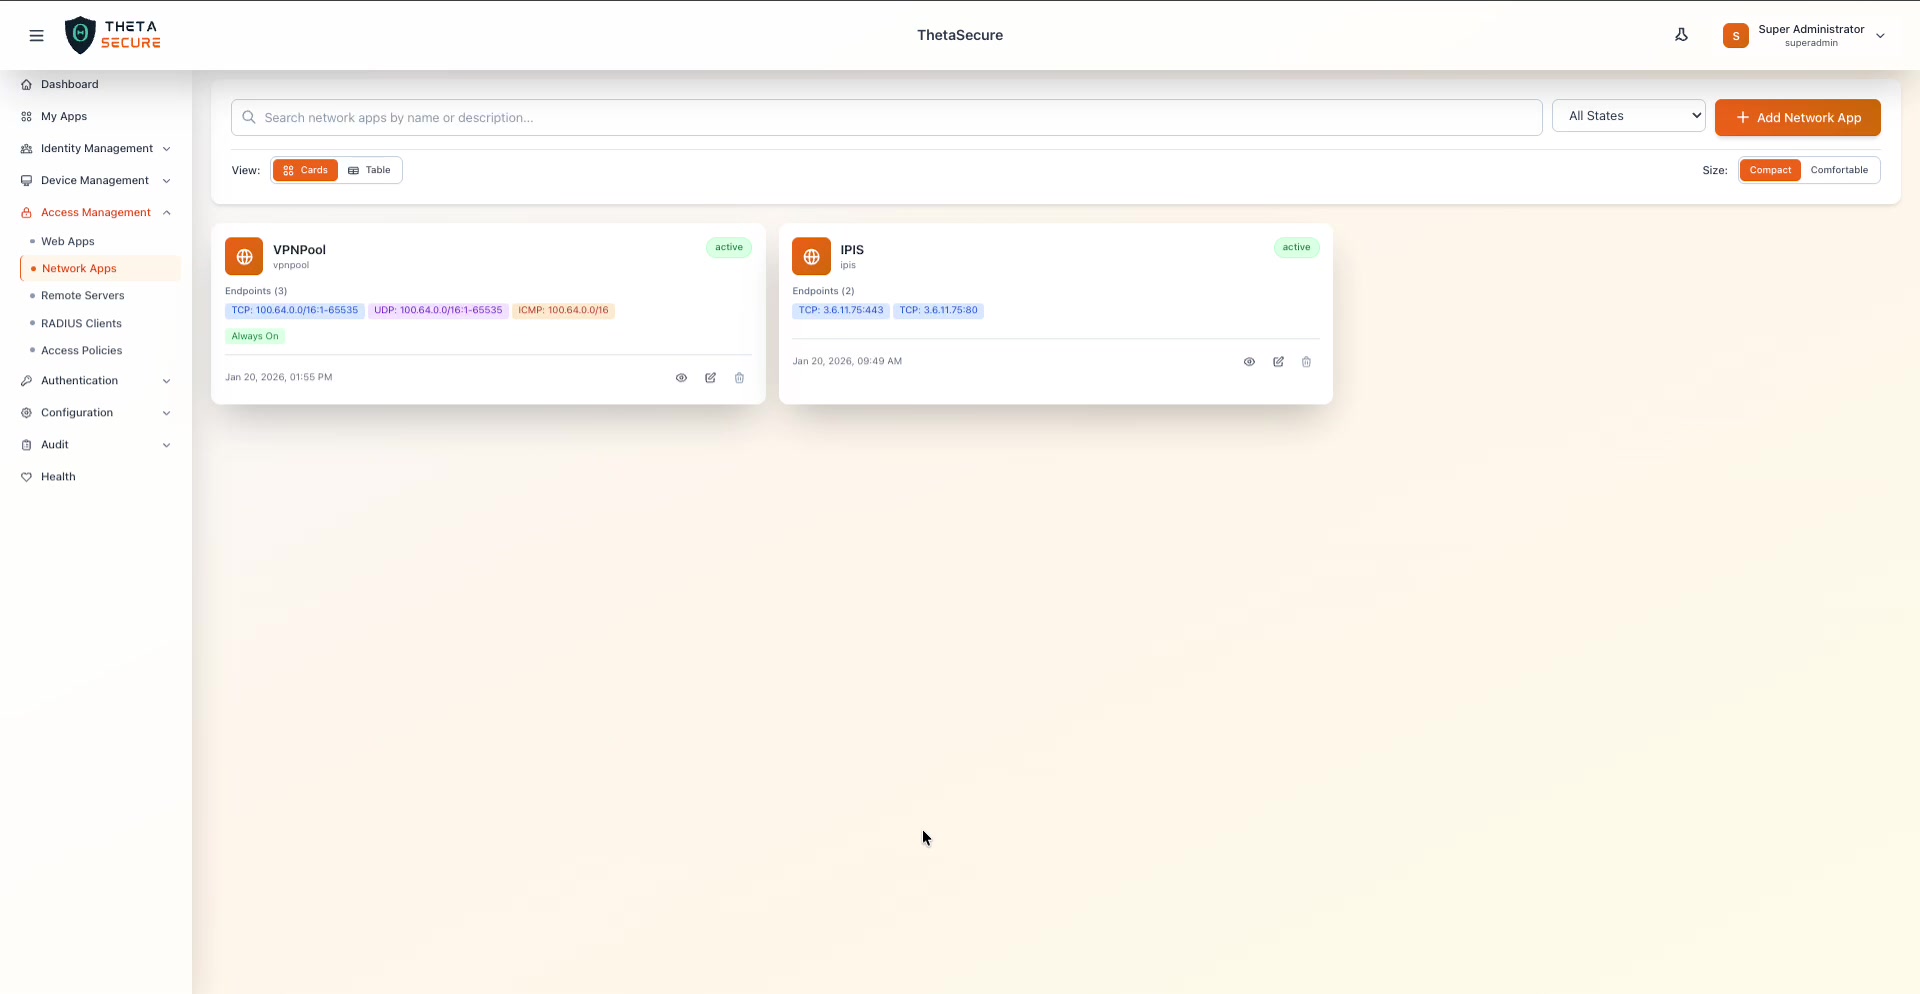 The Network Apps page showing two configured applications in Cards view. The VPNPool app has three endpoints (TCP, UDP, and ICMP) with the "Always On" badge, while the IPIS app has two TCP endpoints. Both show an "active" status badge. Each card displays the endpoint count, protocol badges with IP:port ranges, creation date, and action icons for view, edit, and delete.
The Network Apps Page
The page layout follows the same pattern as Web Apps, with a search bar, a status filter dropdown (All States), and a + Add Network App button. You can toggle between Cards and Table views and choose between Compact and Comfortable card sizes.
Each app card displays:
| Element | Description |
|---|---|
| App Name | The display name and a short slug identifier beneath it (e.g., "VPNPool" / "vpnpool"). |
| Status Badge | Green "active" badge when the app is enabled, or inactive when disabled. |
| Endpoint Count | The number of configured endpoints (e.g., "Endpoints (3)"). |
| Protocol Badges | Color coded badges showing each endpoint's protocol, IP address, and port range. TCP badges are green, UDP badges are orange, and ICMP badges are purple. |
| Feature Badges | Additional badges like "Always On" appear in green text when enabled. |
| Timestamp | The date the app was created. |
| Actions | Three icons at the bottom of each card: view (eye), edit (pencil), and delete (trash). |
Creating a Network App
Click + Add Network App to open the Create Network App panel.
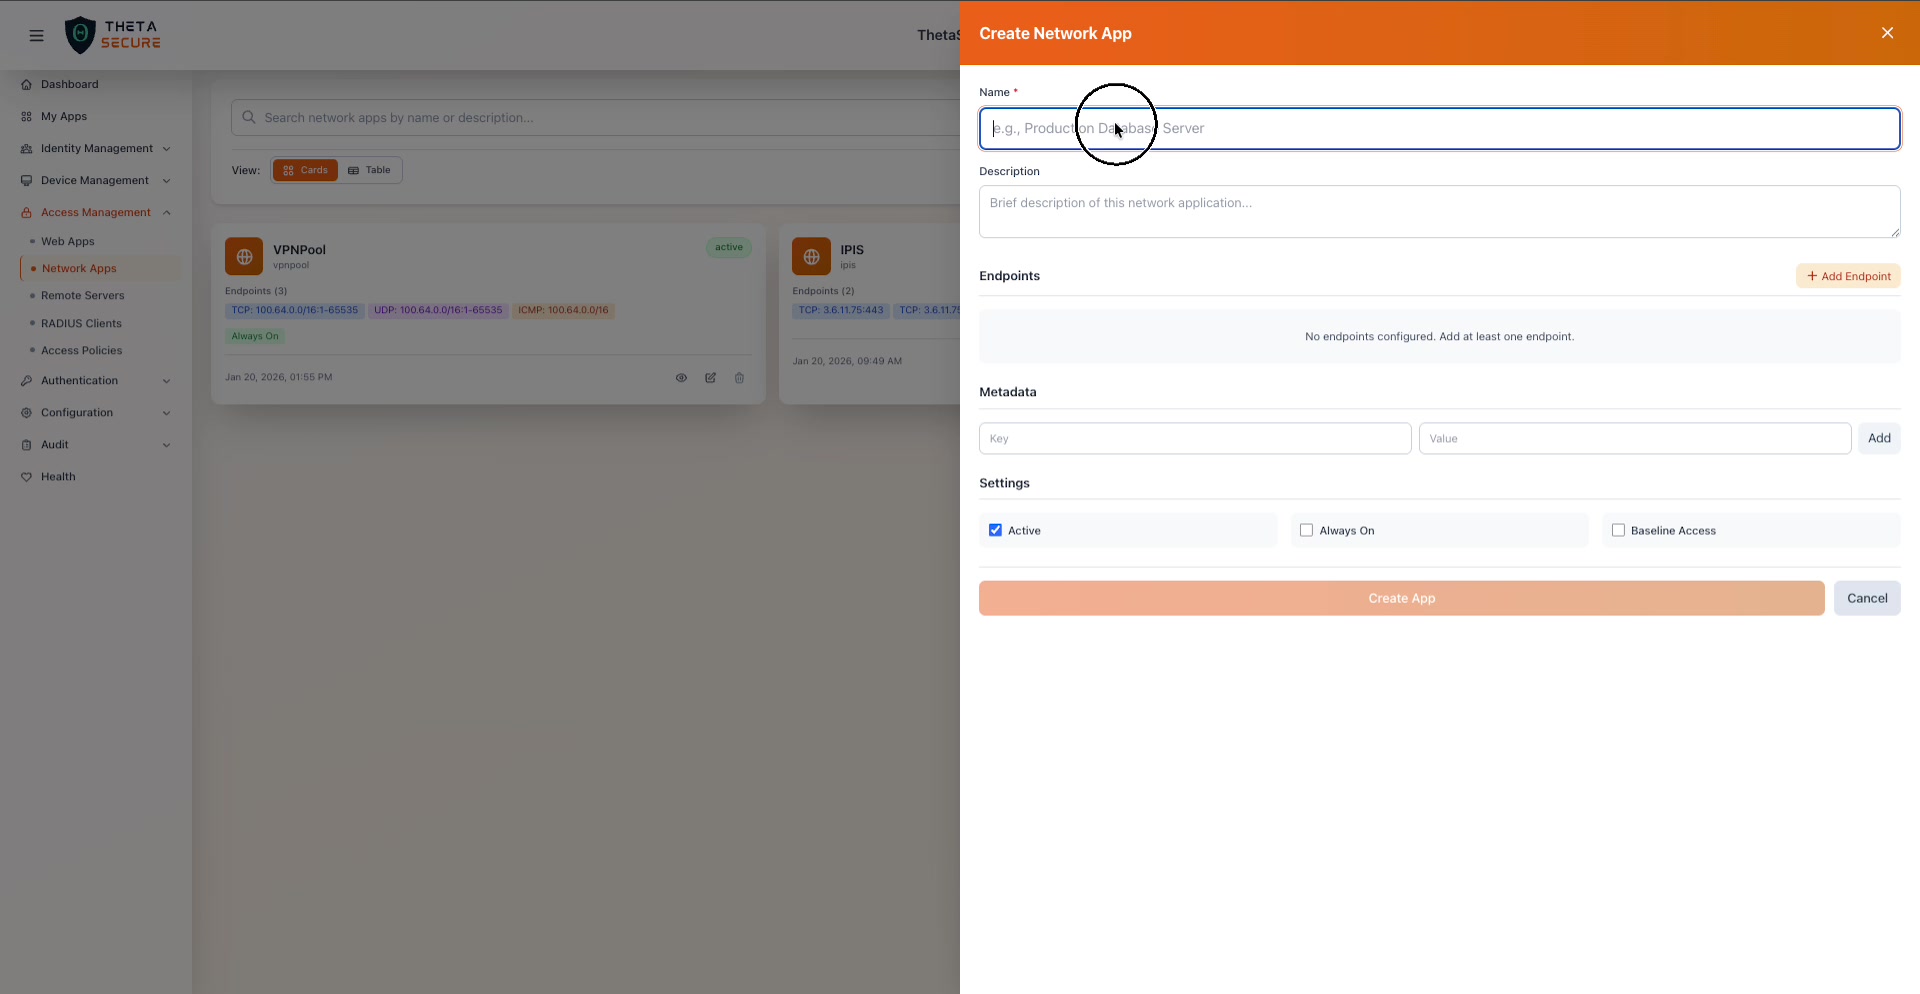 The Create Network App panel. The form is intentionally simple: name the app, add endpoints to define the network resources, attach optional metadata, configure behavior settings, and click Create App.
Basic Information
| Field | Required | Description |
|---|---|---|
| Name | Yes | A descriptive name for the network resource (e.g., "Production Database Server", "Corporate Intranet", "Engineering File Share"). This is what administrators and users see. |
| Description | No | A brief description of what this network application provides and who should have access. |
Endpoints
Endpoints define the specific network destinations that this app protects. Each endpoint specifies a protocol, an IP address or CIDR range, and a port or port range. You can add multiple endpoints to a single app, which is useful when an application spans multiple servers or requires access on different protocols.
Click + Add Endpoint to expand the endpoint form.
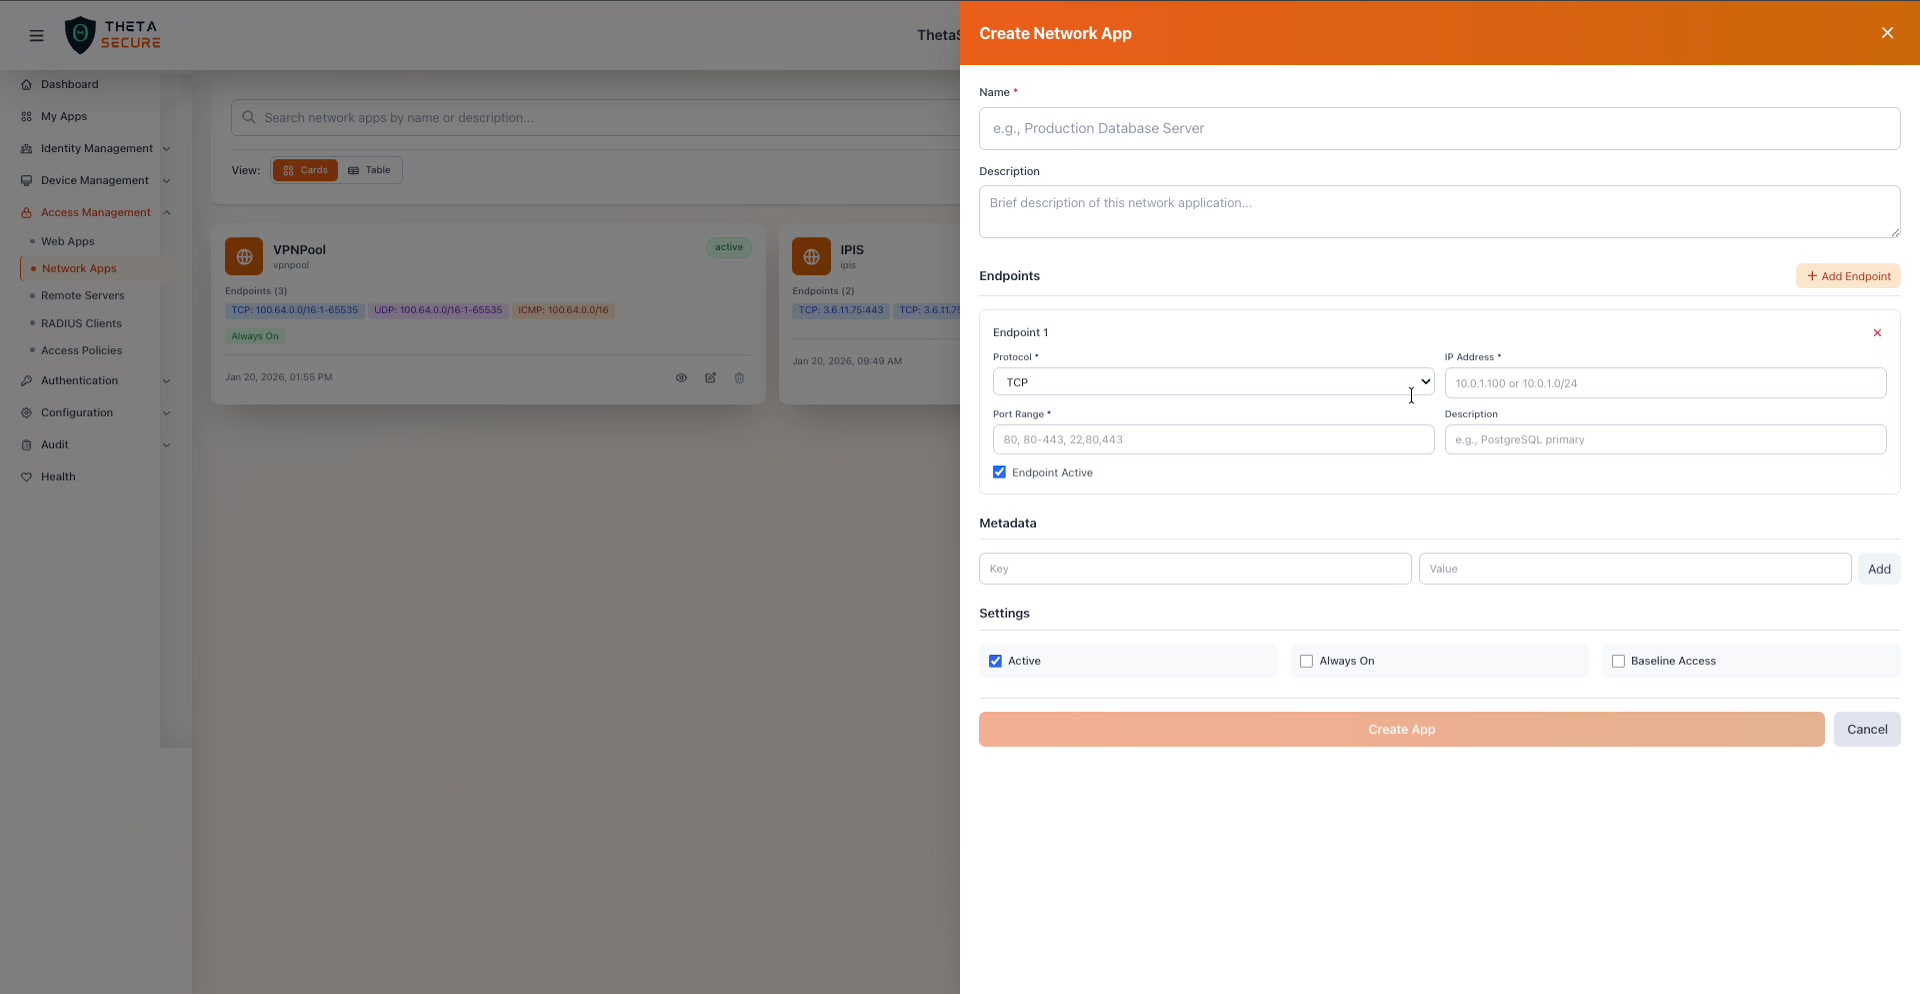 An endpoint definition with Protocol, IP Address, Port Range, Description, and an Endpoint Active checkbox. The Port Range field accepts individual ports, comma separated lists, and ranges.
| Field | Required | Description |
|---|---|---|
| Protocol | Yes | The network protocol: TCP, UDP, or ICMP. TCP is the most common choice for web servers, databases, and SSH. UDP is used for DNS, VoIP, and some game servers. ICMP covers ping and network diagnostics. |
| IP Address | Yes | The destination IP address or CIDR range. Use a single IP (e.g., 10.0.0.1) for a specific server, or a CIDR block (e.g., 10.0.1.0/24) for an entire subnet. |
| Port Range | Yes | The destination port(s). Supports single ports (e.g., 80), comma separated lists (e.g., 80,443,666), and ranges using dashes (e.g., 80-443, 1-65535). You can combine these formats: 80,443-445,666 defines ports 80, 443 through 445, and 666. Not applicable for ICMP endpoints. |
| Description | No | A label for this endpoint (e.g., "Web Server Ports", "PostgreSQL primary"). |
| Endpoint Active | Yes | When checked, this endpoint is included in the tunnel configuration. Unchecking it disables this specific endpoint without deleting it, which is useful for maintenance windows. |
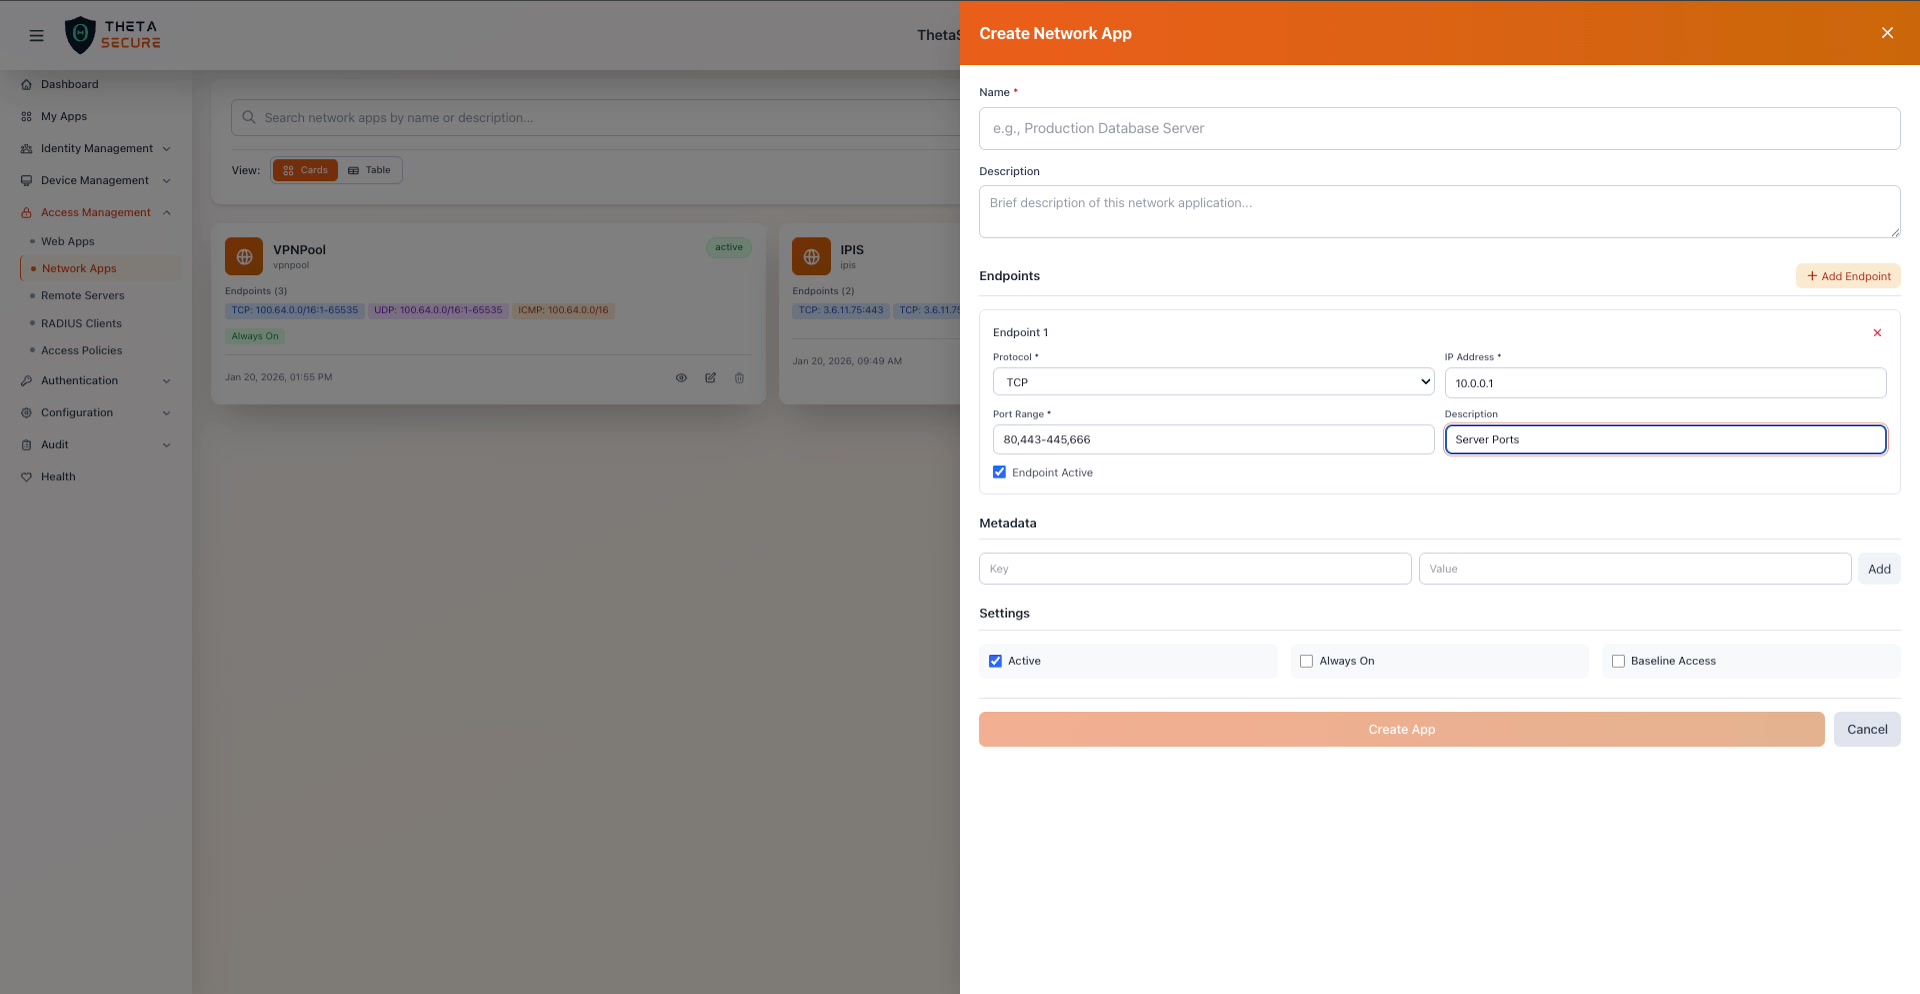 A completed endpoint: TCP protocol, IP address 10.0.0.1, port range "80,443-445,666", description "Web Server Ports". The Endpoint Active checkbox is enabled.
Port range format examples:
80single port80,443two specific ports80-443all ports from 80 through 44380,443-445,666port 80, ports 443 through 445, and port 6661-65535all ports (full range)
You can add multiple endpoints to a single Network App by clicking + Add Endpoint again. For example, the VPNPool app in the screenshot has three endpoints: TCP on the full port range, UDP on the full port range, and ICMP for ping. This effectively creates a full network tunnel to the 100.64.0.0/16 subnet, similar to a traditional VPN, but scoped to a specific CIDR block rather than the entire network.
Metadata
Metadata provides a flexible key value store for attaching custom information to the network app. This is useful for tagging apps with environment names, cost center codes, team ownership, or any other organizational data. Each metadata entry has a Key and a Value. Click Add to include a metadata pair.
Settings
The Settings section contains three checkboxes that control how the Network App behaves. These are critical to understanding ThetaSecure's ZTNA model.
| Setting | Default | Description |
|---|---|---|
| Active | Enabled | Controls whether this app is available for access rules. When Active is checked, the app can be assigned to users through access policies. When unchecked, the app exists in the system but no users can access it, regardless of their policy assignments. Think of this as the master switch: if the admin has not activated the app, it is invisible to the ZTNA tunnel engine. |
| Always On | Disabled | Enables ThetaSecure's Always On tunnel for this application. When selected, the ThetaSecure agent establishes the tunnel to this app automatically at machine boot, even before the user logs in to their operating system session. This is designed for roaming users and enterprise management scenarios. IT administrators can push Group Policies, SCCM updates, endpoint management configurations, and security patches to devices even when they are off the corporate network. The tunnel persists across reboots and login/logout cycles, providing both seamless user experience and uninterrupted device management. |
| Baseline Access | Disabled | When enabled, every authenticated user in the organization automatically receives access to this application without needing an explicit access policy assignment. This is designed for commonly used resources that the entire organization needs, such as HRMS portals, corporate intranet sites, internal wikis, or shared file servers. Instead of creating access rules for every user and group, Baseline Access grants universal access by default. Resources that require restricted access (e.g., production databases, admin consoles) should not use Baseline Access and should rely on explicit access policies instead. |
Viewing App Details
Clicking the eye icon on a card opens the details panel for that Network App.
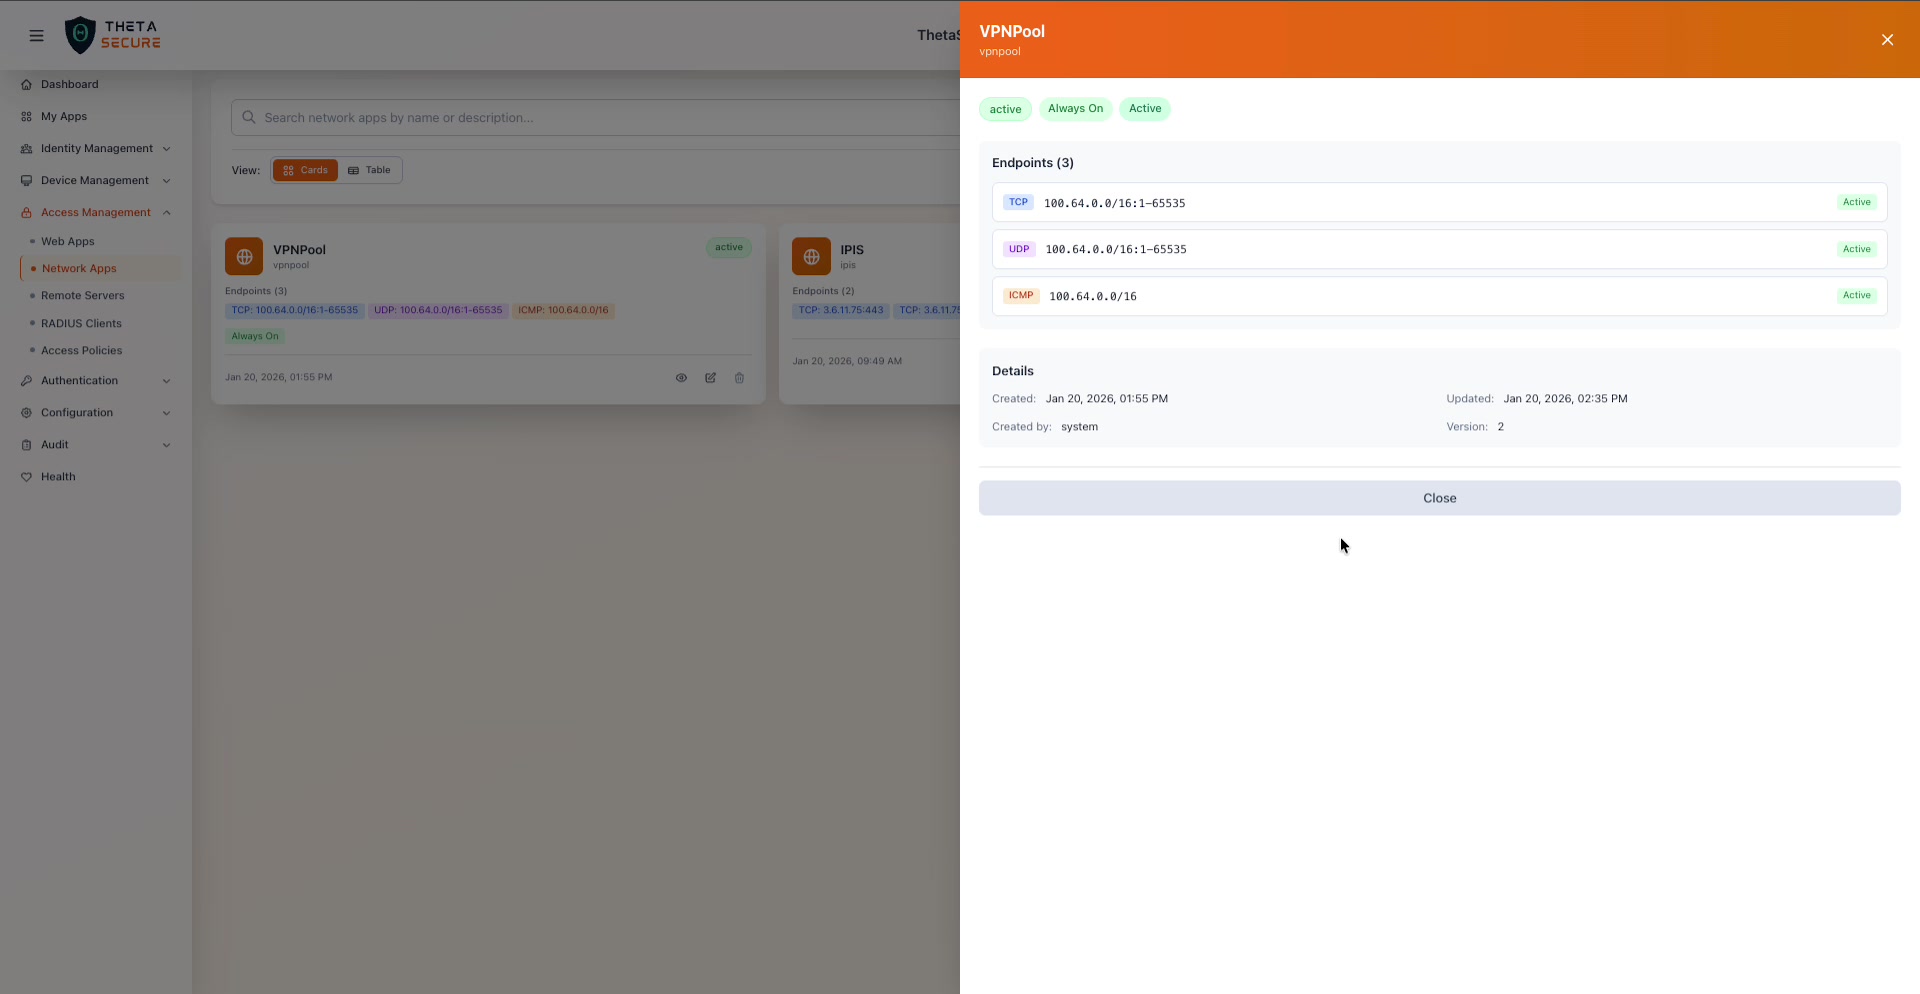 The VPNPool details panel. The top shows status badges ("active", "Always On", "Active"), followed by the endpoint list with protocol labels, IP:port ranges, and per-endpoint Active status. The Details section at the bottom shows creation and update timestamps, the creator, and the version number.
The details panel provides a read only summary of the app:
| Section | What It Shows |
|---|---|
| Status Badges | The app's current state. The VPNPool example shows three badges: "active" (the app is enabled), "Always On" (the tunnel persists across reboots), and "Active" (the master setting is on). |
| Endpoints | Each endpoint is listed with its protocol badge (TCP in green, UDP in orange, ICMP in purple), the IP address and port range, and an "Active" status label on the right. |
| Details | Created date, Updated date, Created by (the user or "system"), and Version number (incremented on each edit). |
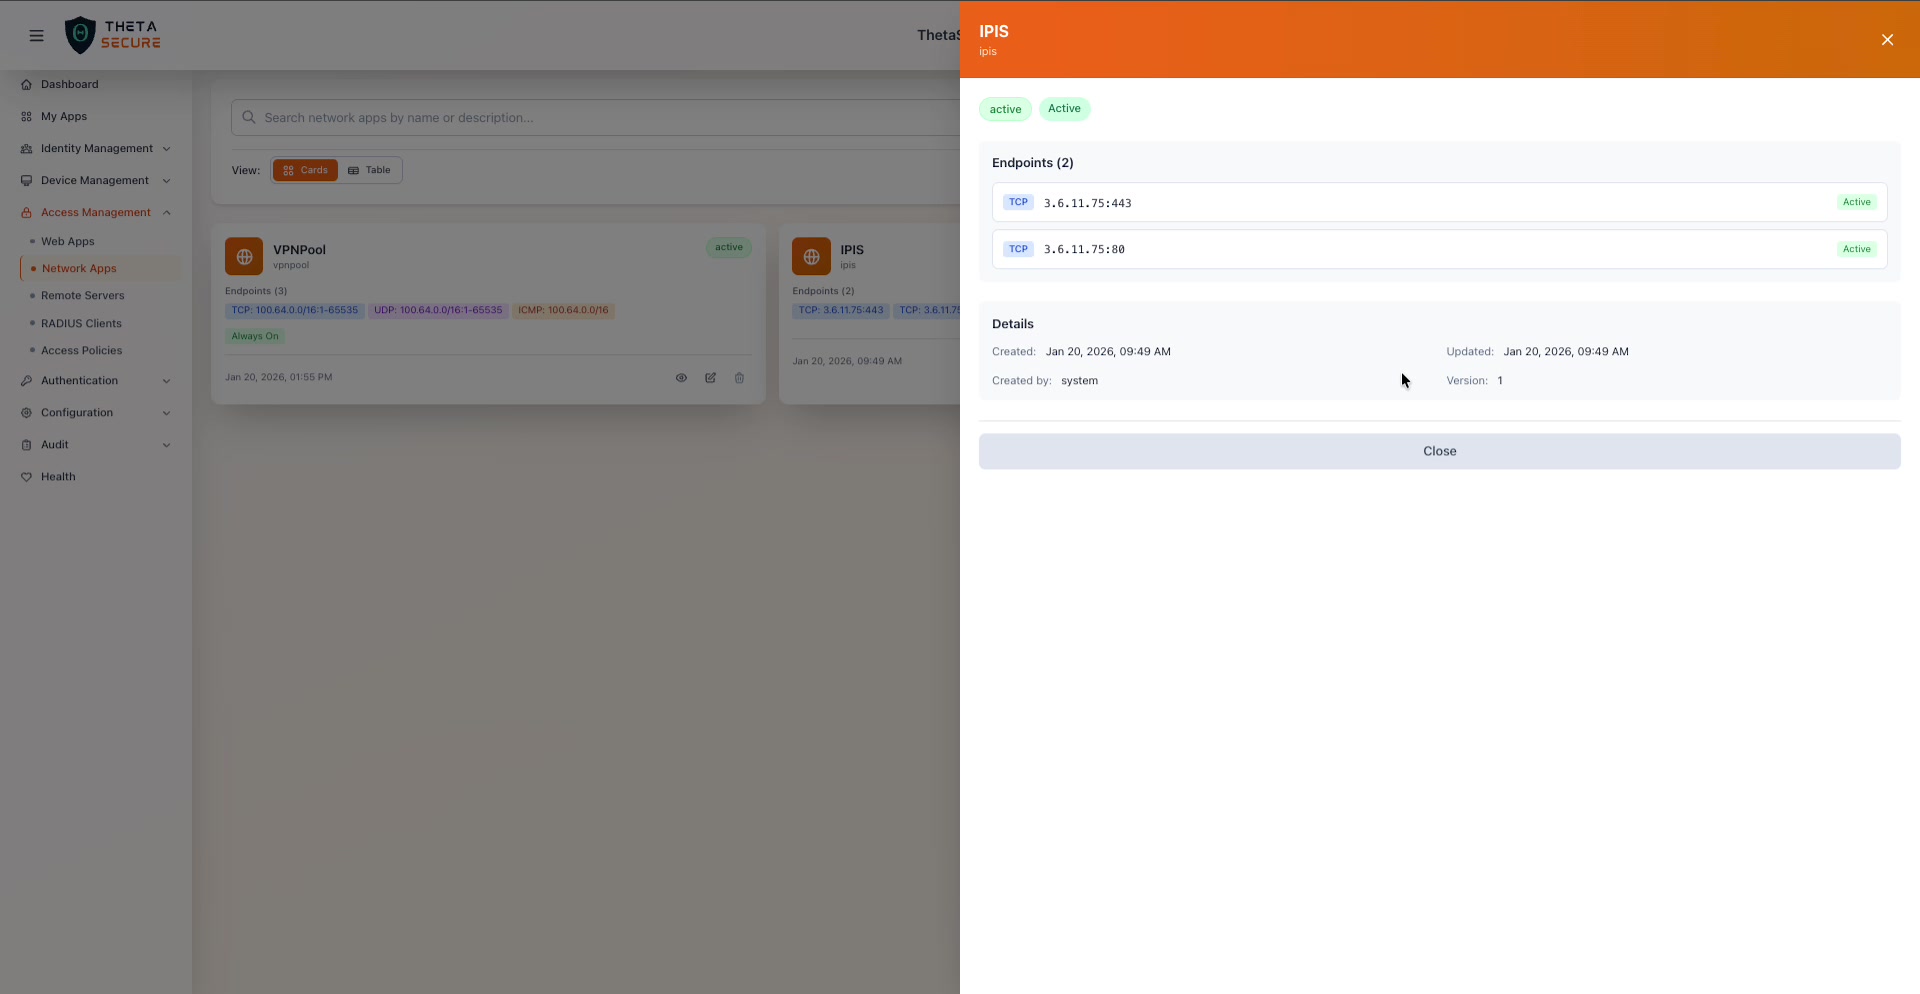 The IPIS app details panel. This app has two TCP endpoints pointing to specific IP:port combinations (3.6.11.75:443 and 3.6.11.75:80). It shows "active" and "Active" badges but no "Always On" badge, meaning the tunnel only establishes when the user is logged in and connected.
Comparing the two examples illustrates the flexibility of the model. The VPNPool app uses CIDR ranges with full port ranges across TCP, UDP, and ICMP, effectively creating a subnet level tunnel. The IPIS app uses specific IP and port combinations to expose only HTTPS (443) and HTTP (80) on a single server. Both are valid approaches depending on whether you need broad or granular access.
Editing and Deleting Apps
The edit icon (pencil) opens the same form as Create Network App, pre-populated with the app's current configuration. You can modify any field, add or remove endpoints, and change the Settings checkboxes. Changes take effect immediately and increment the app's version number.
The delete icon (trash) removes the app entirely. Any access rules that reference this app will no longer grant access to its endpoints.
Best Practices
Start granular, not broad. It is tempting to create a single Network App with a large CIDR block and full port ranges. While this works (as the VPNPool example shows), it defeats the purpose of Zero Trust. Instead, create separate Network Apps for each logical application or service, each with the minimum ports required. This gives you audit visibility into which users are accessing which resources.
Use Always On for device management. If your organization pushes Group Policies, SCCM updates, or endpoint management configurations to remote devices, enable Always On on the Network App that covers your management infrastructure. This ensures devices remain reachable even when the user is not logged in, which is essential for security patching and compliance.
Use Baseline Access for universal resources. Applications like the corporate intranet, HRMS, or internal knowledge base that every employee needs should have Baseline Access enabled. This reduces the administrative overhead of creating individual access rules and ensures new employees have immediate access to essential tools.
Deactivate before deleting. If you need to temporarily remove access to a resource (during maintenance or an incident), uncheck the Active setting rather than deleting the app. This preserves the configuration and all associated access rules, making it easy to restore access once the maintenance window is over.
Use endpoint descriptions. When a Network App has multiple endpoints, labeling each one (e.g., "Web Server Ports", "Database Replication", "SSH Management") makes it much easier to understand the app's purpose during audits and troubleshooting.