Access Policies
Access policies define the rules that govern which users and groups can access specific applications and under what conditions. Each policy combines identity assignments (users, groups) with conditional rules (IP restrictions, time windows) to enforce granular access control across your environment.
ThetaSecure organizes access policies into three categories, each corresponding to a different application type:
| Policy Type | Applies To | Use Case |
|---|---|---|
| Web Access Policies | Web applications configured as OIDC, SAML, or Bookmark apps | Control who can authenticate to your SSO integrated applications |
| Network Access Policies | Network applications using ZTNA micro tunnels | Restrict access to internal network resources by user, location, or schedule |
| RDP/SSH Policies | Remote servers accessed through the browser based gateway | Govern who can initiate SSH, RDP, VNC, or Telnet sessions |
All three policy types share the same structure for assignments and rules. The only difference is the pool of applications available when you assign resources to the policy.
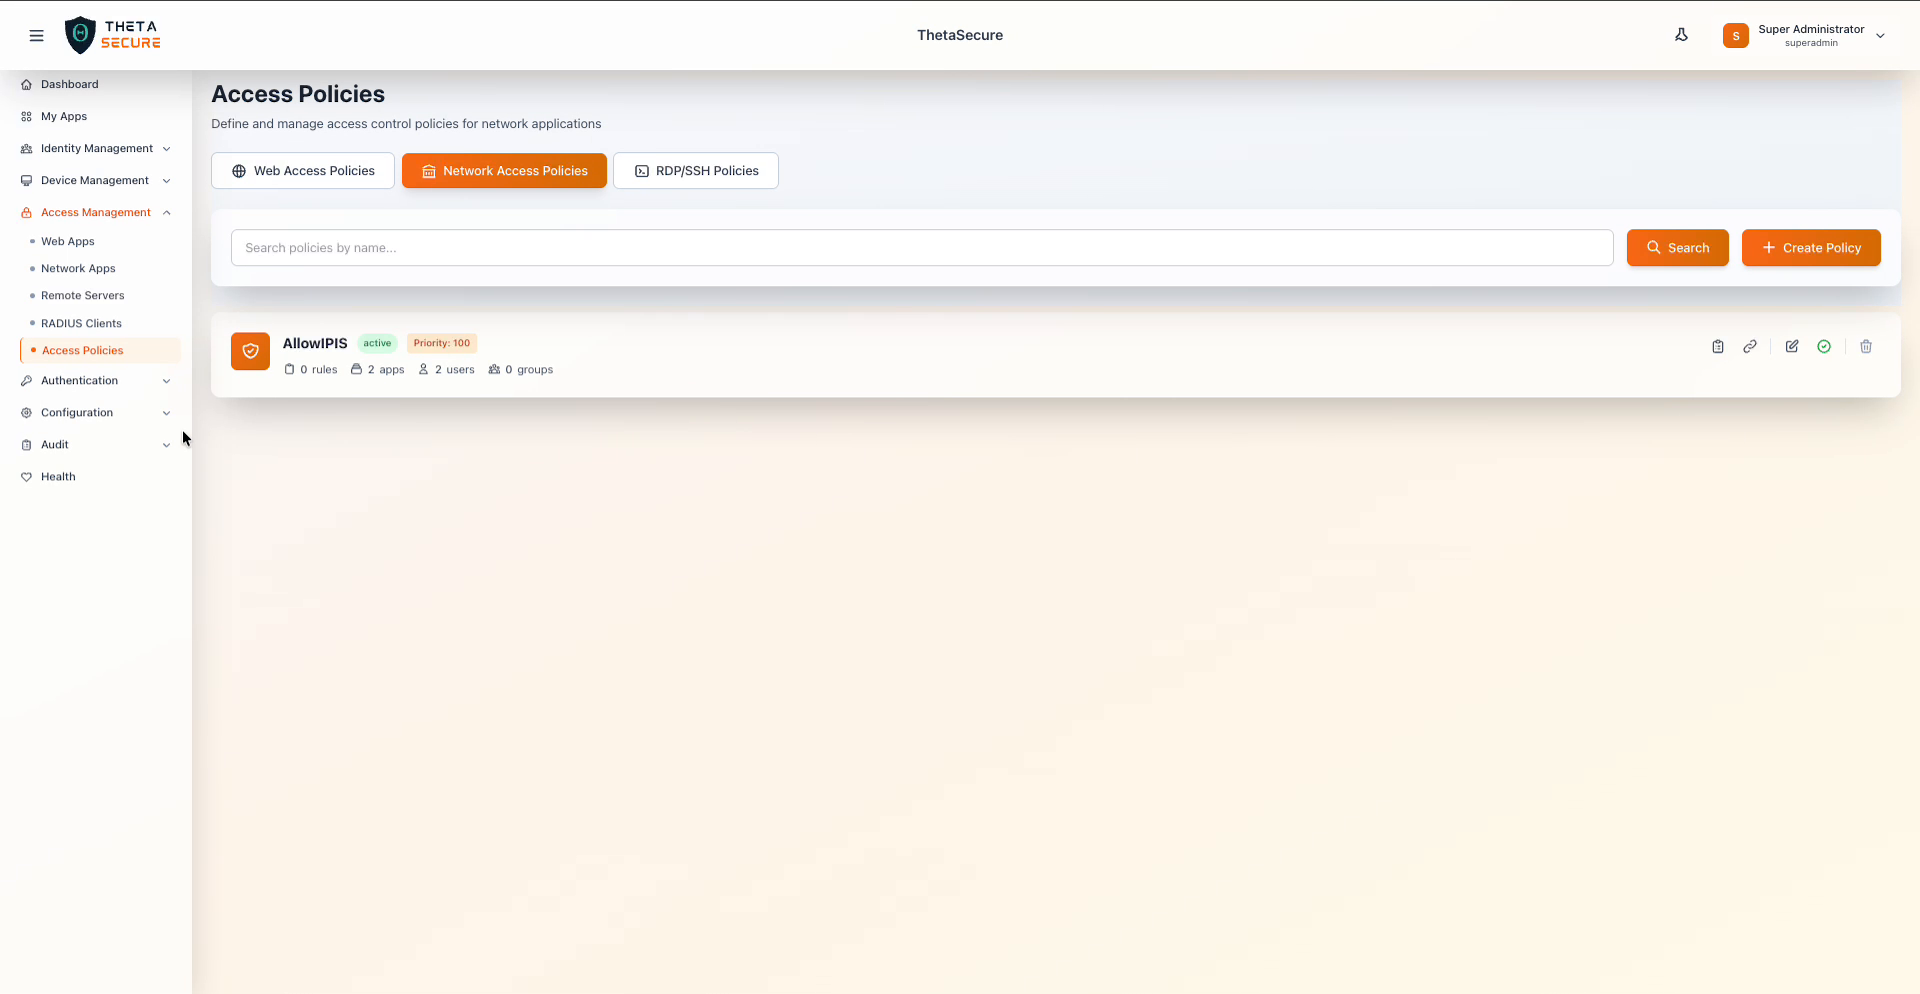 The Access Policies page with the Network Access Policies tab selected, showing an existing policy with its status, priority, and summary counts.
Policy Structure
Every access policy consists of three components that work together to determine access:
Identity assignments define who the policy applies to. You assign individual users, groups, or both. When a user belongs to a group that is assigned to a policy, they inherit that policy's access. Assigning groups is the recommended approach because it scales with your directory and reduces per user management overhead.
Application assignments define what the policy grants access to. Each policy can include one or more applications. Only applications that match the policy type appear in the assignment list. For example, a Network Access Policy can only be assigned to network applications, not to web apps or remote servers.
Rules define the conditions under which access is allowed. Rules use IP range restrictions and time window constraints to add contextual controls beyond simple identity matching. A policy can have zero or more rules, and each rule has its own priority to determine evaluation order.
Start with group based assignments rather than assigning individual users. As your organization grows, managing policies through groups aligned with departments, roles, or projects is significantly easier to maintain and audit.
Creating a Policy
To create a new access policy, select the appropriate tab for the policy type you need (Web Access Policies, Network Access Policies, or RDP/SSH Policies) and click + Create Policy. You will need to provide a policy name and a priority value.
The priority determines the order in which policies are evaluated when a user matches multiple policies. Lower numbers indicate higher priority. For example, a policy with priority 10 is evaluated before a policy with priority 100. If a user is covered by multiple policies, the highest priority policy that matches takes precedence.
Each policy also has a status badge that shows whether it is active or inactive. You can toggle a policy between these states using the enable/disable action on the policy card without deleting it, which is useful for temporarily suspending access during maintenance or investigations.
Managing Policy Rules
Rules add conditional logic to a policy. While a policy without rules grants access based purely on identity and application assignments, adding rules lets you restrict access based on the user's network location or the time of day.
To manage rules, click the Manage Rules icon on the policy card. This opens the Policy Rules panel where you can add new rules or view existing ones.
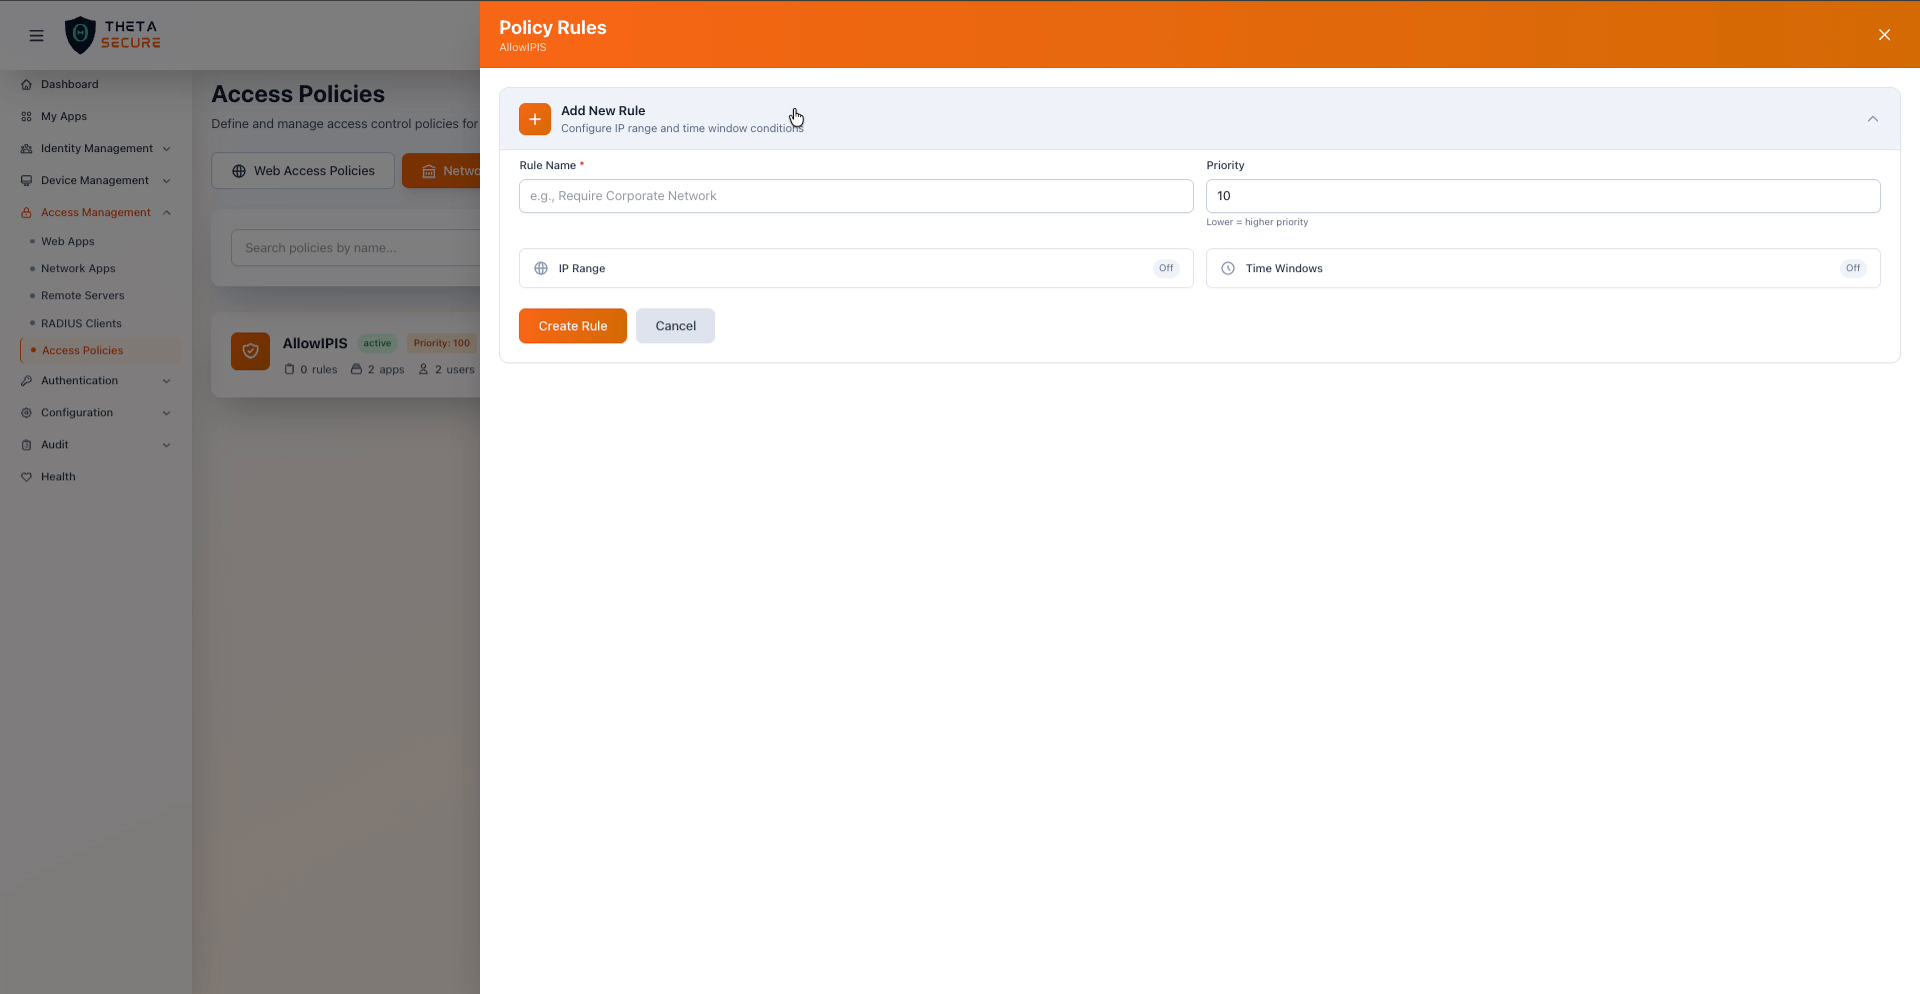 The Policy Rules panel with the Add New Rule form expanded, showing the Rule Name, Priority, and toggle switches for IP Range and Time Windows conditions.
Adding a Rule
Each rule requires a Rule Name and a Priority value. As with policy level priority, lower rule priority numbers are evaluated first. Rules within a policy are evaluated independently, and you can combine IP and time conditions in a single rule for layered enforcement.
IP Range Conditions
Toggle IP Range to On to restrict access based on the user's source IP address. The IP range condition supports CIDR notation and provides two fields:
| Field | Description | Example |
|---|---|---|
| Include IPs (CIDR) | Only allow access from these IP ranges. Add one or more CIDR blocks. | 192.168.1.0/24 |
| Exclude IPs (CIDR) | Deny access from these IP ranges, even if they fall within an included range. | 10.0.0.0/8 |
Exclusions take precedence over inclusions. If an IP address matches both an include and an exclude range, access is denied. This lets you define broad network ranges and carve out specific exceptions.
Time Window Conditions
Toggle Time Windows to On to restrict access to specific days and hours. Each time window specifies:
| Field | Description |
|---|---|
| Days | Select one or more days of the week (MON through SUN) |
| Start Time | The beginning of the access window (for example, 09:00 AM) |
| End Time | The end of the access window (for example, 05:00 PM) |
| Timezone | The timezone in which the window is evaluated (defaults to UTC) |
You can add multiple time windows to a single rule using the + Add Window link. This is useful when access schedules differ across days, such as allowing extended hours on weekdays and restricted hours on weekends.
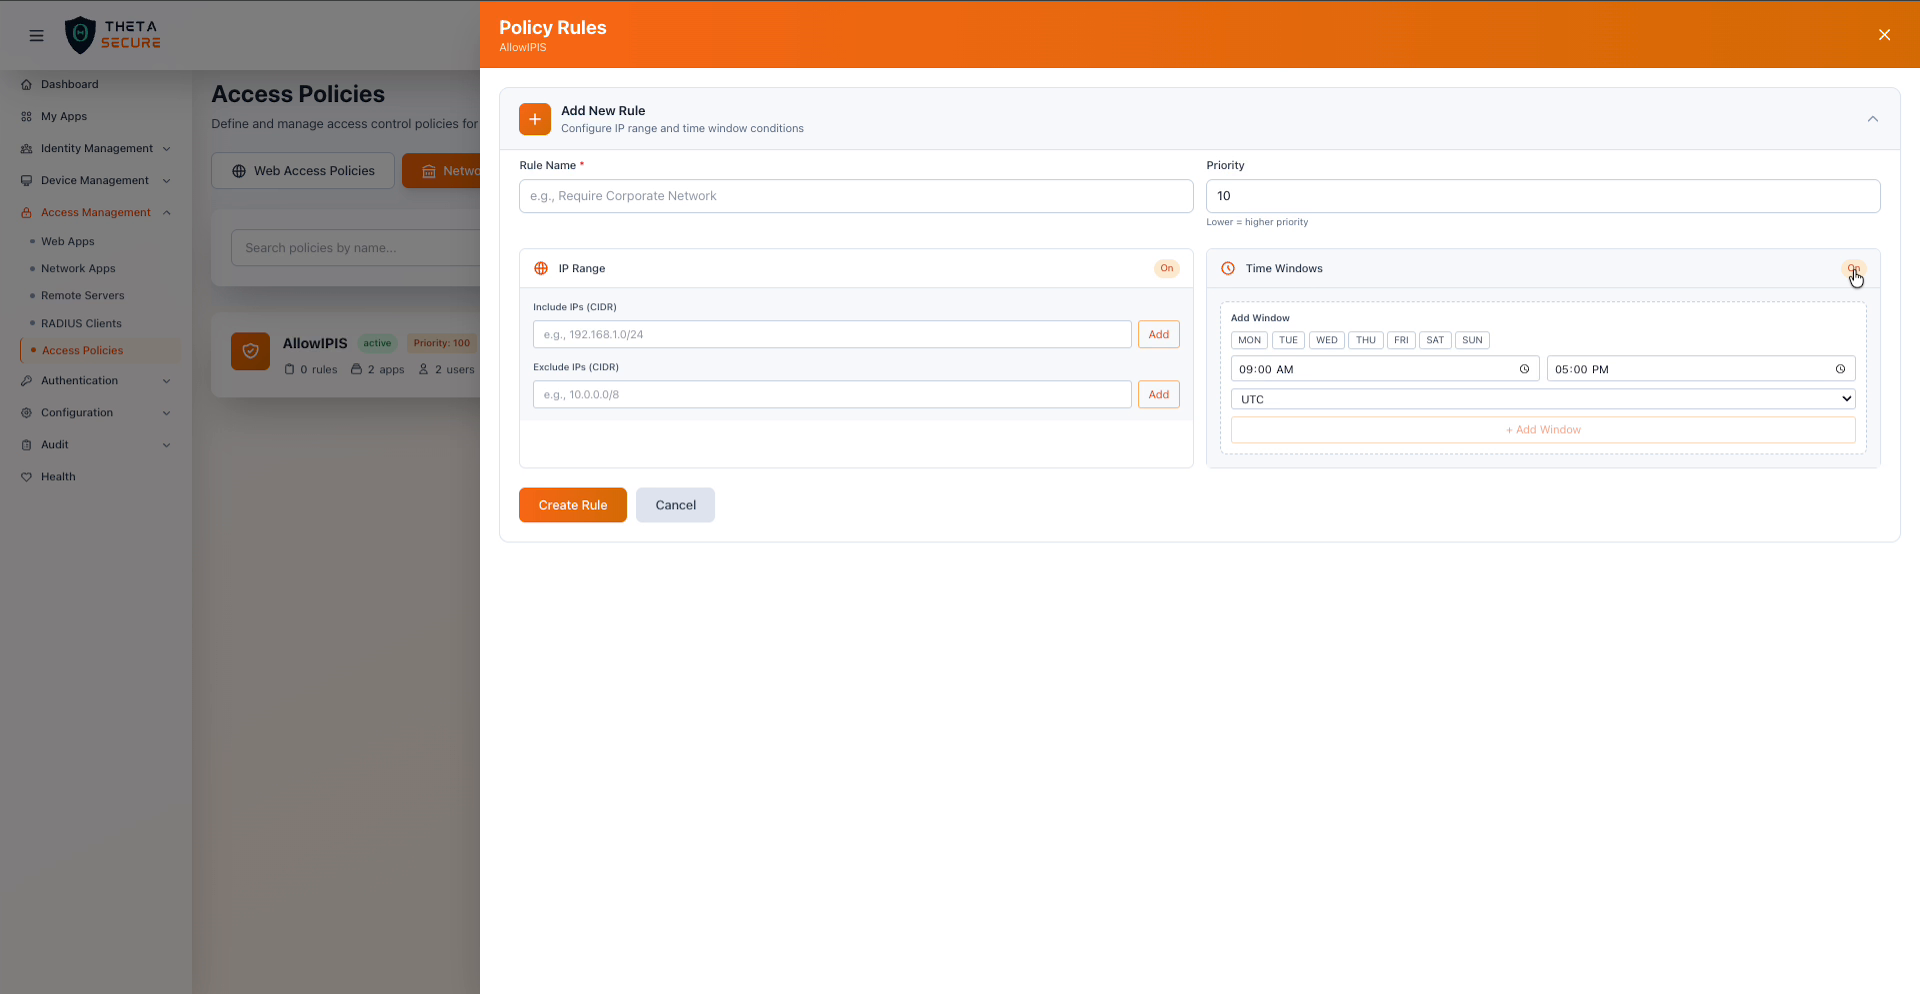 A rule with both IP Range and Time Windows conditions enabled, showing the CIDR input fields and the day/time schedule configuration.
Always set the timezone explicitly to match your organization's primary operating timezone. Leaving it as UTC can result in unexpected access windows if your users are in a different timezone.
Managing Policy Assignments
Click the Manage Assignments icon on the policy card to open the Policy Assignments panel. This panel has three tabs that control who can access what: Users, Groups, and Applications. The relationship between them reads as: the assigned users and groups can access the assigned applications.
Assigning Users
The Users tab shows two lists side by side. The left list displays users currently assigned to this policy, and the right list shows all available users in your directory. Use the + button next to an available user to assign them, or click the × next to an assigned user to remove them. Both lists support search and pagination for large directories.
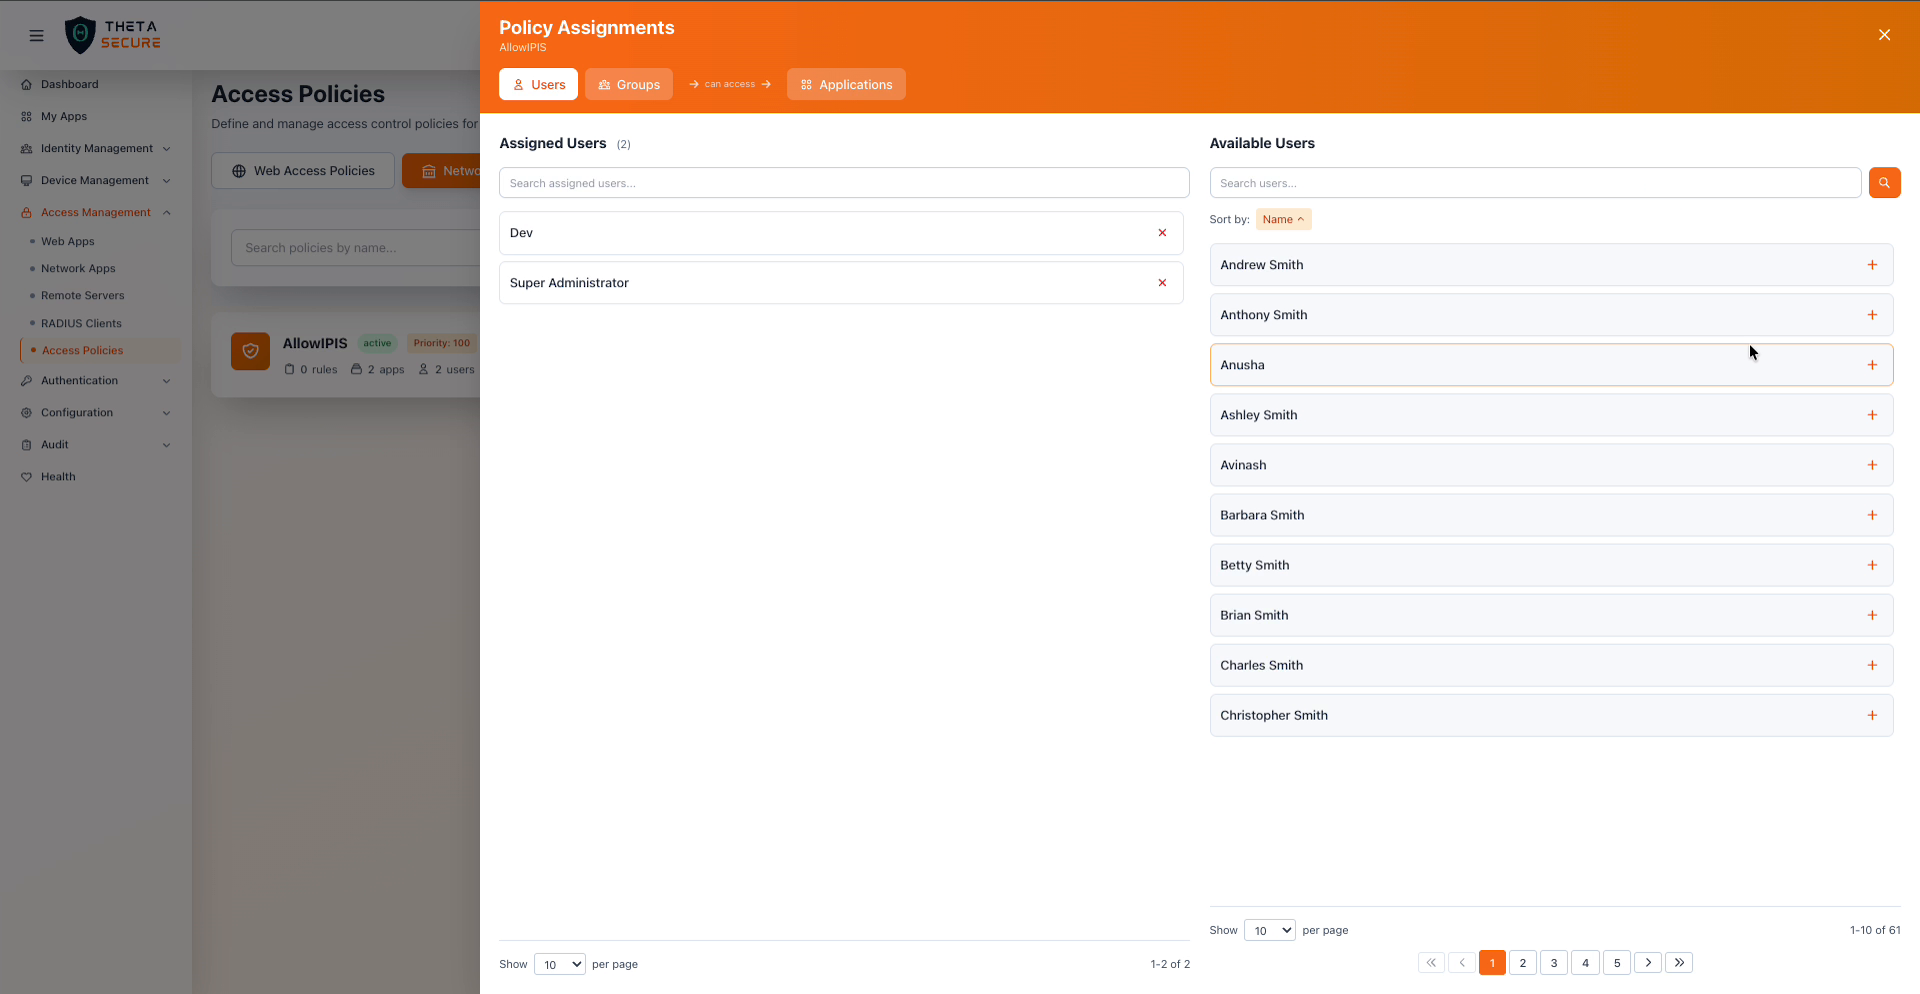 The Users tab of Policy Assignments, showing assigned users on the left and the full directory of available users on the right.
Assigning Groups
The Groups tab works identically to the Users tab but operates on groups from your identity directory. Assigning a group grants all members of that group access through this policy. When group membership changes in your directory (including through directory sync), the policy automatically reflects the updated membership.
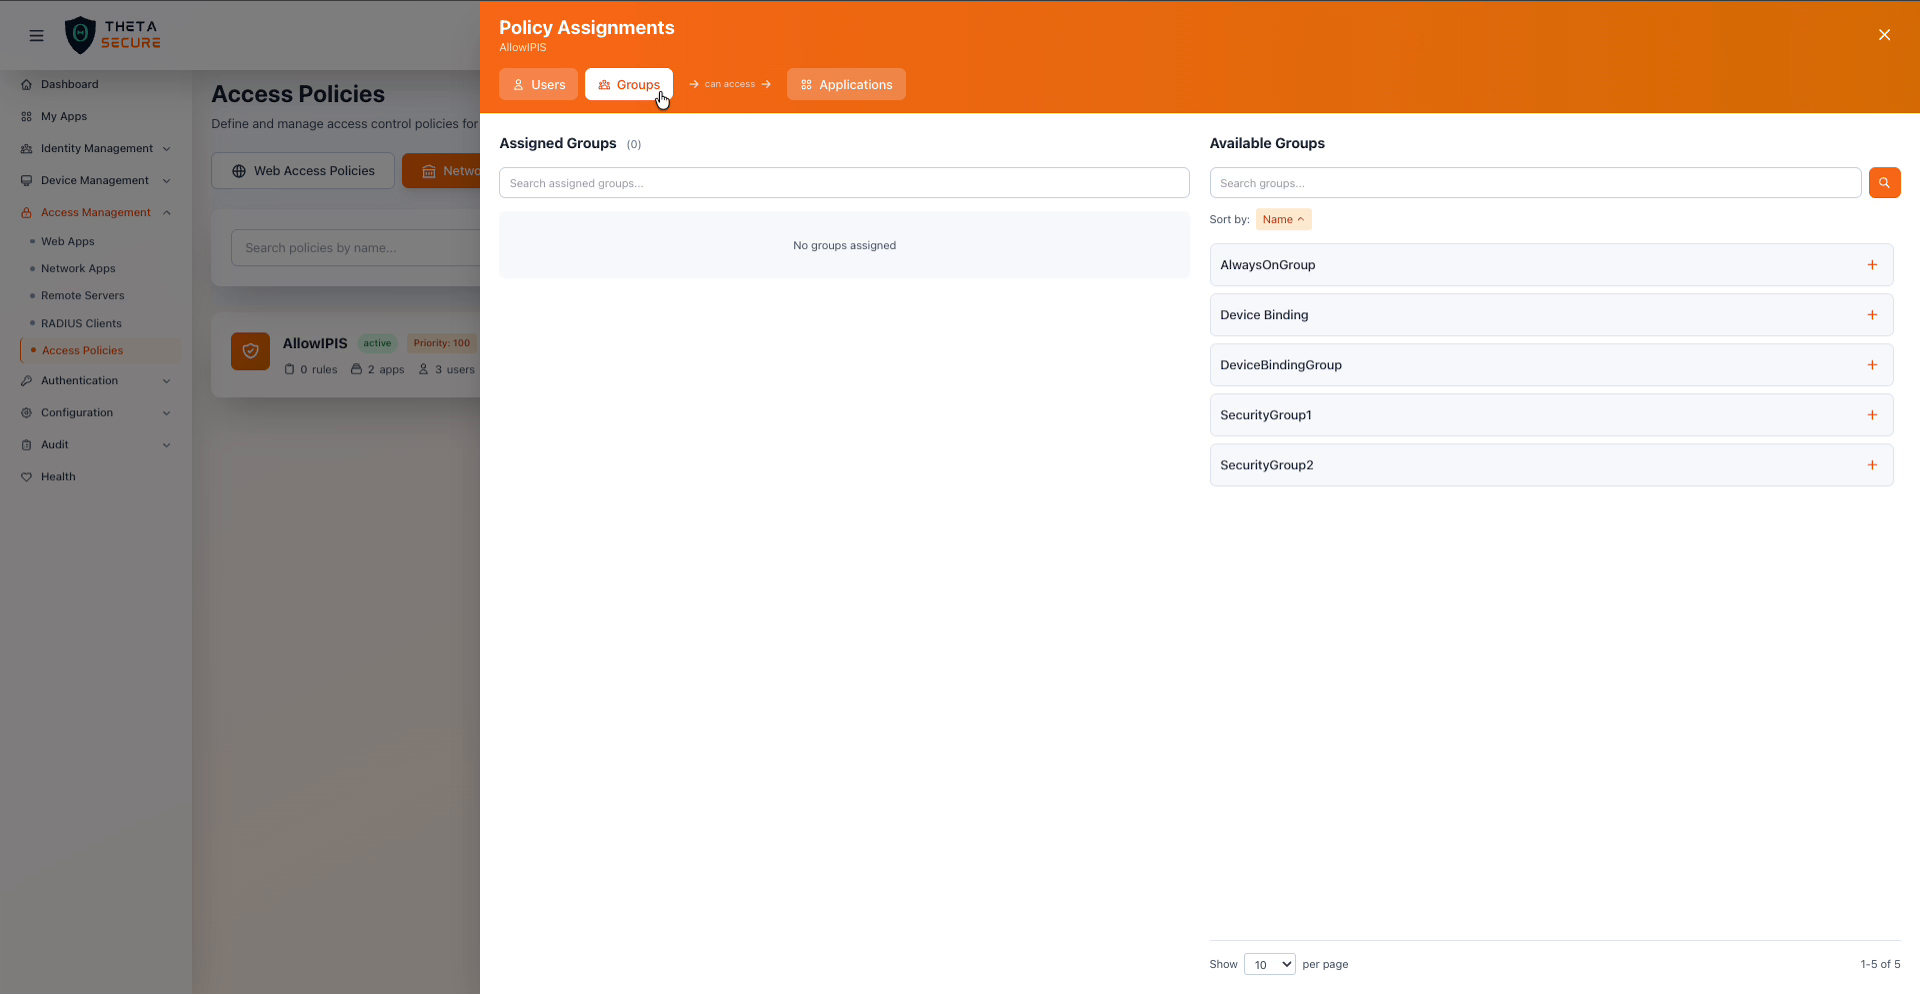 The Groups tab showing available groups that can be assigned to the policy.
Assigning Applications
The Applications tab determines which resources this policy governs. Only applications matching the policy type appear here. For a Network Access Policy, only network applications are listed. For a Web Access Policy, only web applications appear.
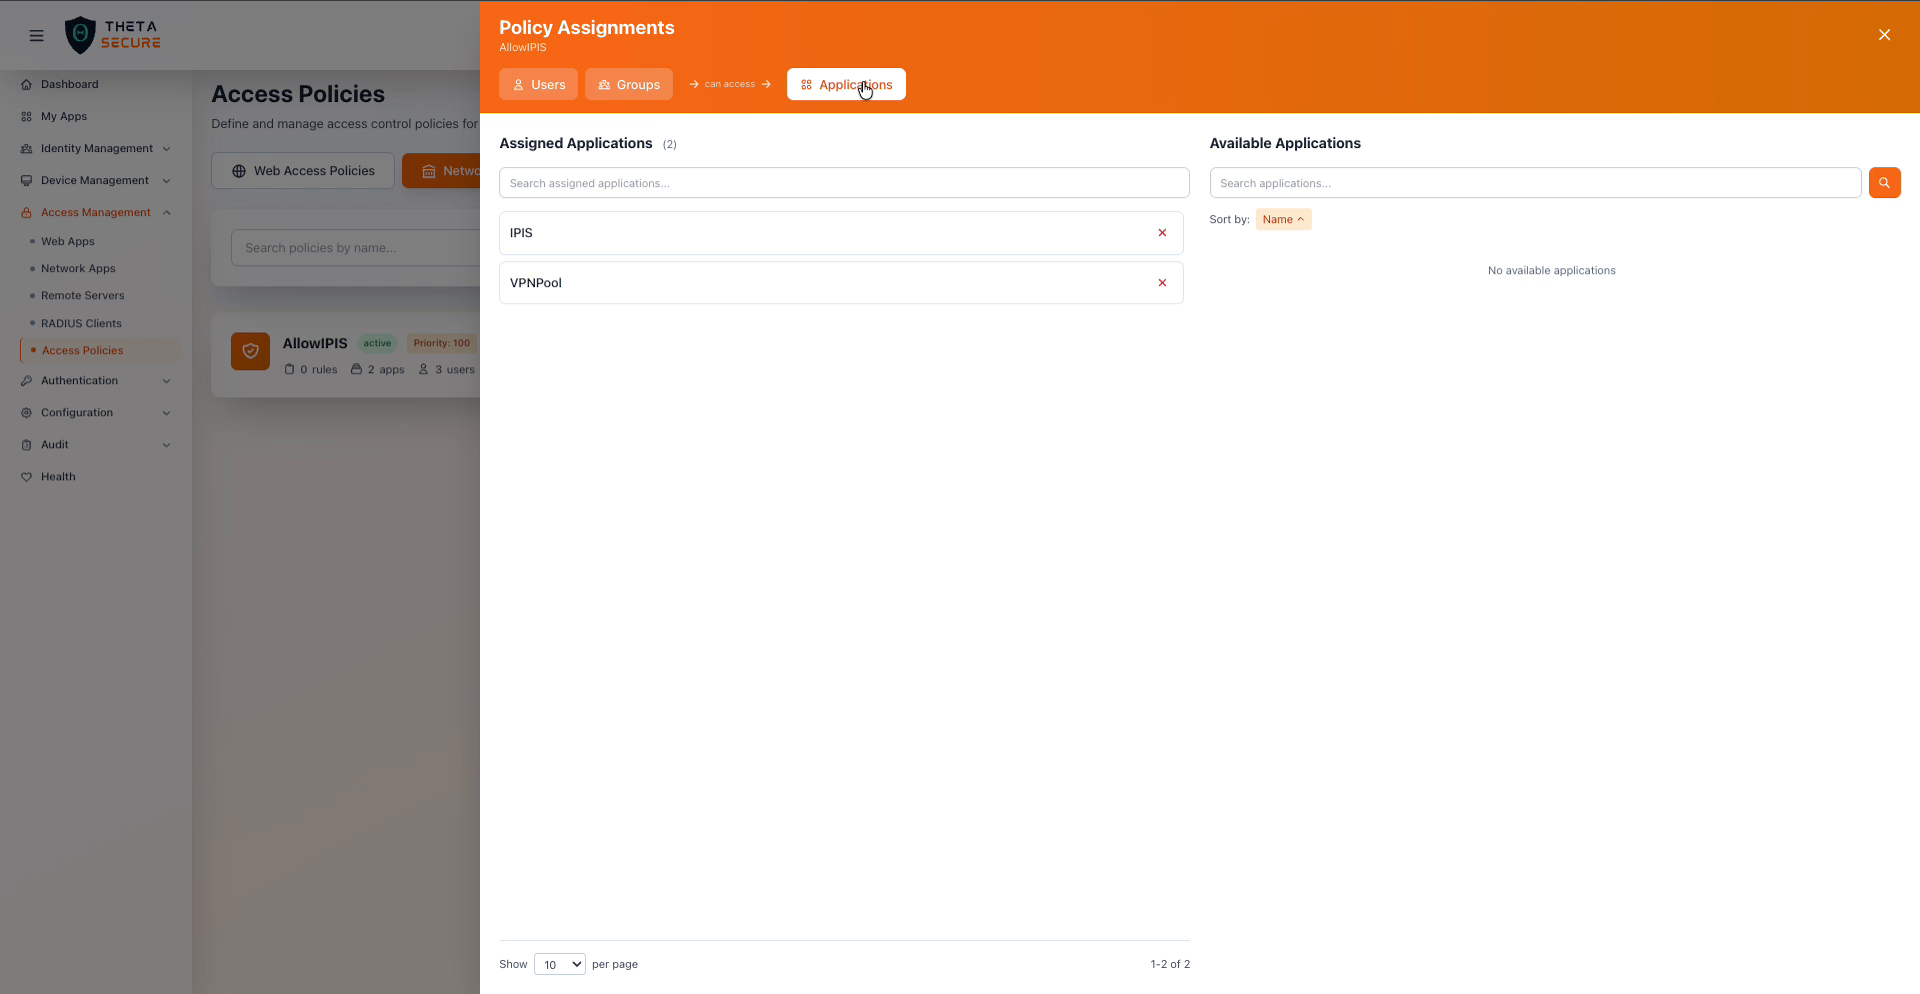 The Applications tab showing two network applications assigned to this policy.
When an application shows in the Assigned Applications list but not in the Available Applications list, it means all applications of that type have already been assigned to this policy. If you need to assign the same application to multiple policies, the application will appear as available in each policy independently.
Policy Card Actions
Each policy card in the list displays summary information including the policy name, status, priority, and counts for rules, applications, users, and groups. The action icons on the right side of each card provide quick access to management functions:
| Icon | Action | Description |
|---|---|---|
| Document icon | Manage Rules | Open the Policy Rules panel to add or view conditional rules |
| Link icon | Manage Assignments | Open the Policy Assignments panel to manage users, groups, and applications |
| Pencil icon | Edit | Modify the policy name, priority, or other settings |
| Circle icon | Enable/Disable | Toggle the policy between active and inactive states |
| Trash icon | Delete | Permanently remove the policy |
Policy Evaluation and Best Practices
When a user attempts to access a resource, ThetaSecure evaluates all active policies that apply to that resource in priority order. Understanding this evaluation flow helps you design policies that are both secure and maintainable.
Use layered policies for defense in depth. Rather than creating a single policy with broad access, consider multiple policies at different priority levels. For example, a high priority policy might restrict contractor access to business hours only, while a lower priority policy grants full time employees unrestricted access to the same resource.
Combine IP restrictions with time windows for high security resources. For sensitive applications, requiring both a corporate IP range and business hours access ensures that even valid credentials cannot be used from unexpected locations or at unusual times. This is particularly effective for compliance with frameworks like SOC 2 and ISO 27001 that require demonstrable access controls.
Regularly audit policy assignments. Use the summary counts on each policy card (rules, apps, users, groups) as a quick health check. A policy with zero users and zero groups is effectively orphaned and should either be assigned or removed. A policy with a large number of directly assigned users may be a candidate for group based assignment instead.
Use inactive status for temporary changes. Rather than deleting and recreating policies during maintenance windows or incident response, toggle the policy to inactive. This preserves the full configuration including all rules and assignments, allowing you to reactivate quickly once the situation is resolved.